Usage of App level
Application settings
Settings related settings are listed bellow
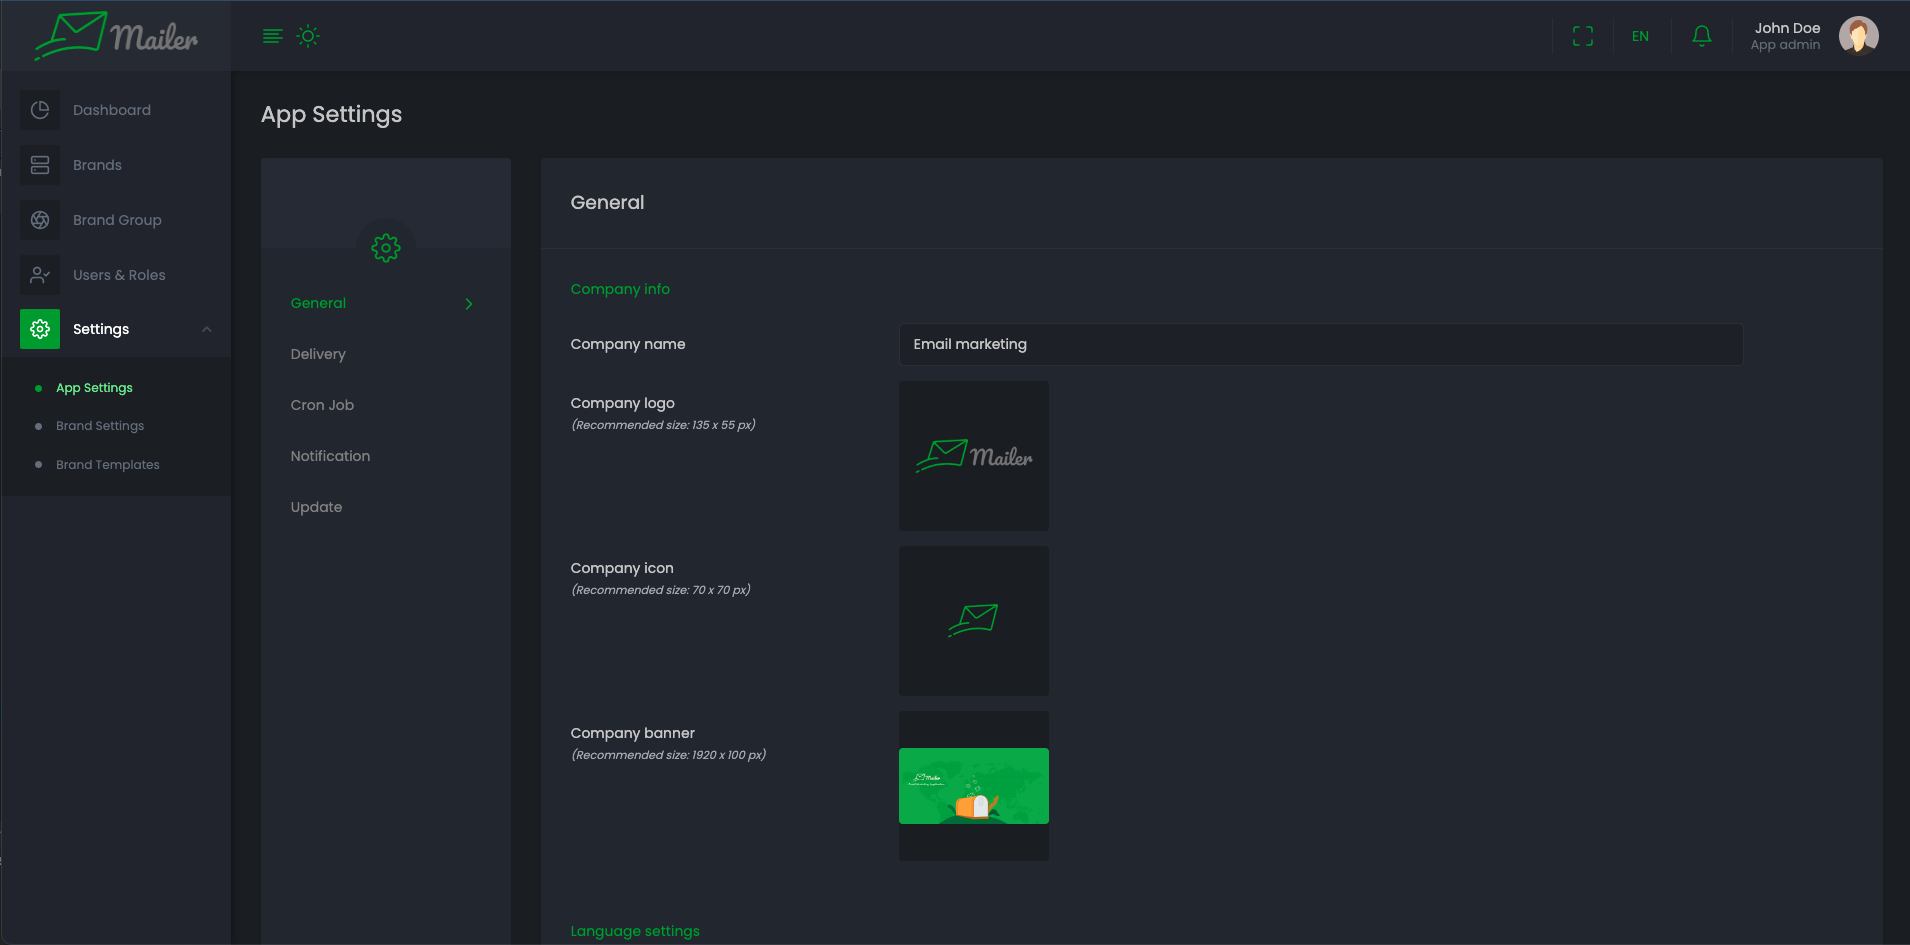
General settings
-
Go to "Settings" > "App Settings" > "General"
-
You can set your Company name.
-
Company logo is used in you application. Select image of your logo.
-
Upload an icon as Company icon of the application.
-
Upload your Company banner of the application.
-
Change suitable Language for application.
-
Set Date and Time format and Timezone the way you want to see date/time in your application.
-
Decimal separator, Thousand separator, Number of decimal also can be set.
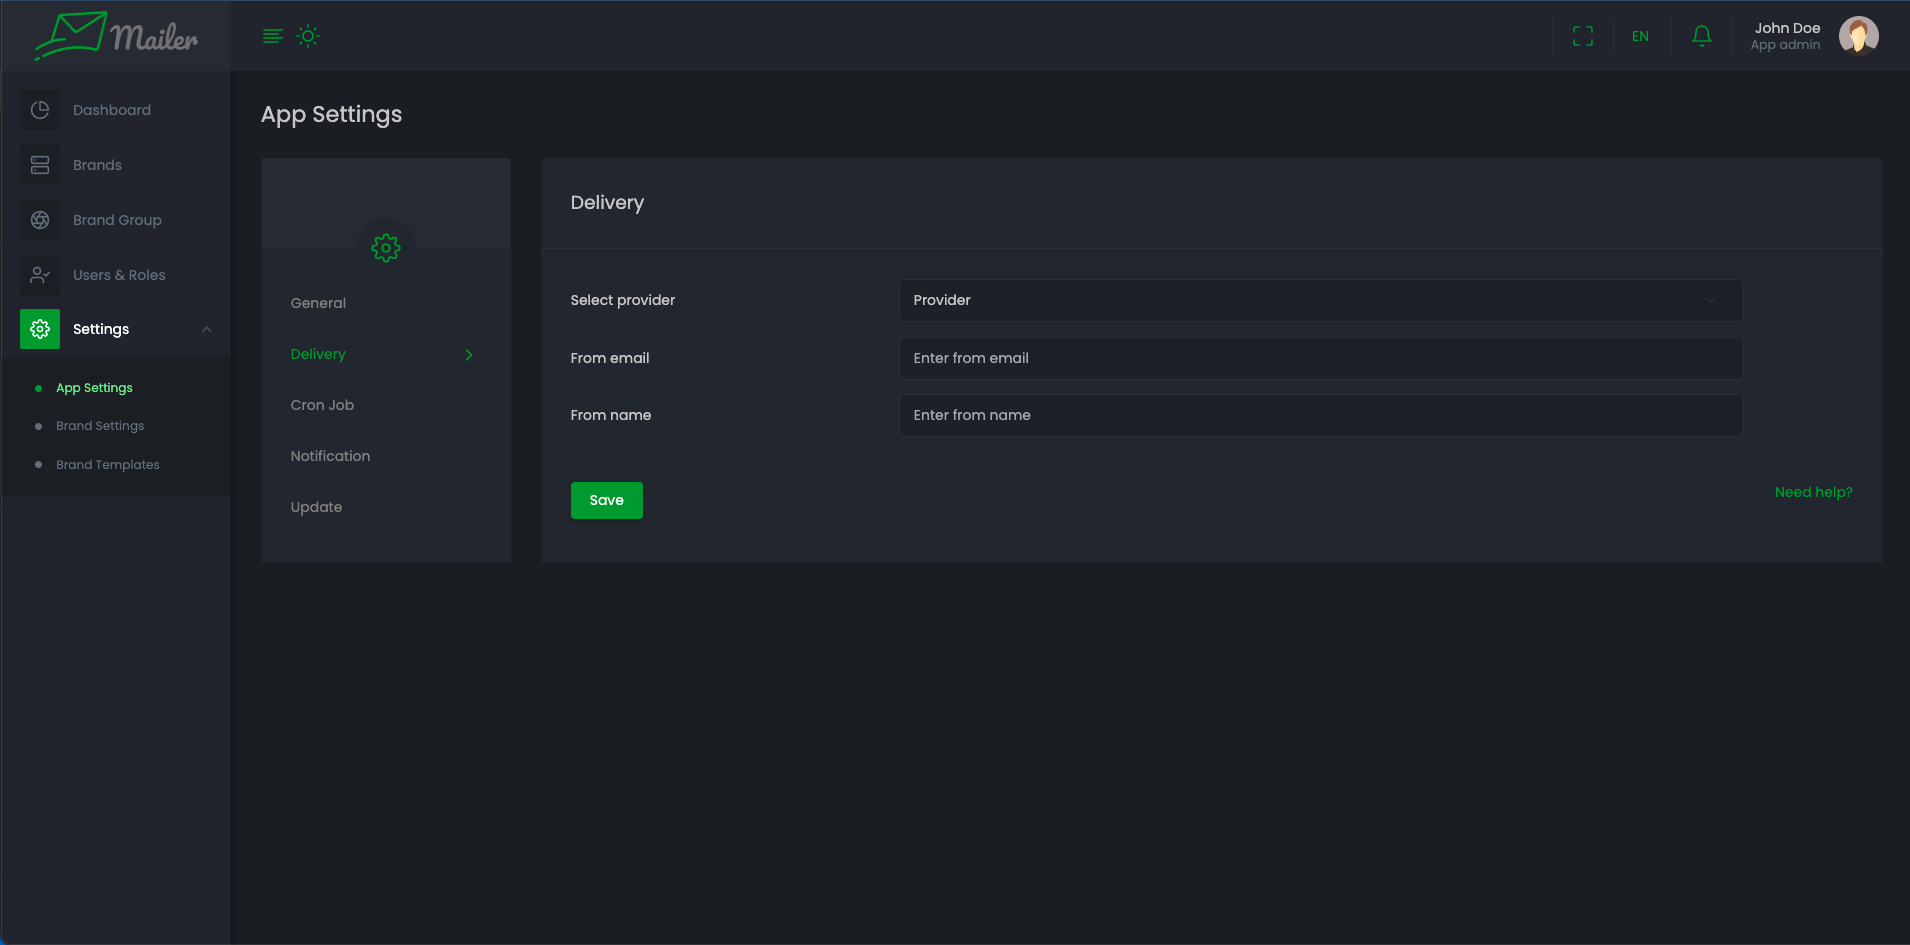
Delivery settings
App level configuration will be used for app related processing. For example inviting user, password reset email, Notification etc.
-
Go to "Settings" > "App Settings" > "Delivery"
-
In app side brand settings section you can choose previously(From "Settings" > "App Settings" > "Delivery") added delivery settings and set that for all brand
Notification settings
-
Go to "Settings" > "App Settings" / "Brand Setting" > "Notification"
-
You can update settings from here and Also can update the template of notification. You have the following option
-
You can set channels where the notification will send.
-
You can set choose users who will be notified on selected event.
-
You can set choose roles to set these audiences under that roles to get notified.
-
You can set up the template for the notification

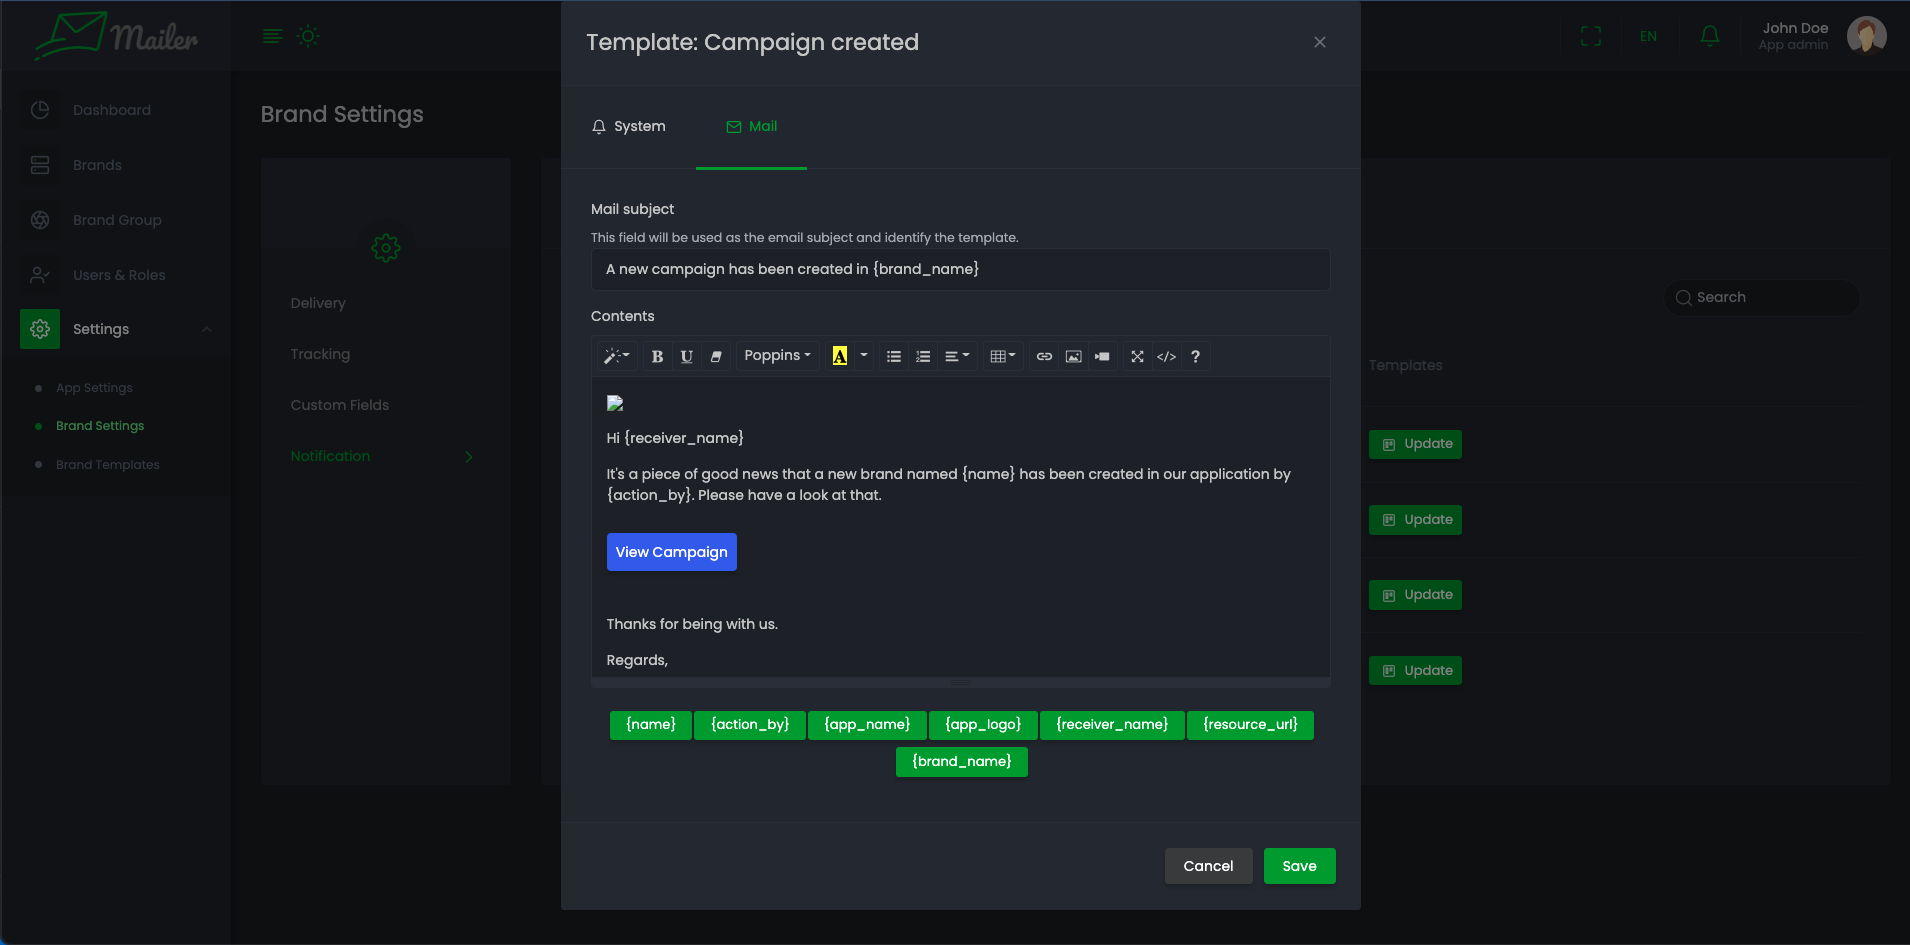
When updating template to insert tag into template you have to click on the tag to insert. But for something like url or image you have add them from editor menu. From above screenshot if you want to add the {resource_url} tag to the template. Click on the link option and add it in second input. Add your link header in first input. For {app_logo}, Click on picture from editor menu and add this to the input box
-
Brand settings
Here Notification is similar to App level settings.
Delivery
-
Go to "Settings" > "Brand Setting" > "Delivery"
-
Here you can save the default delivery setting for the Brands. You can set any previous saved settings or save new settings.
Privacy
-
Go to "Settings" > "Brand Setting" > "Privacy"
-
You can change tracking of Email Opens, Clicks and Locations of campaigns.
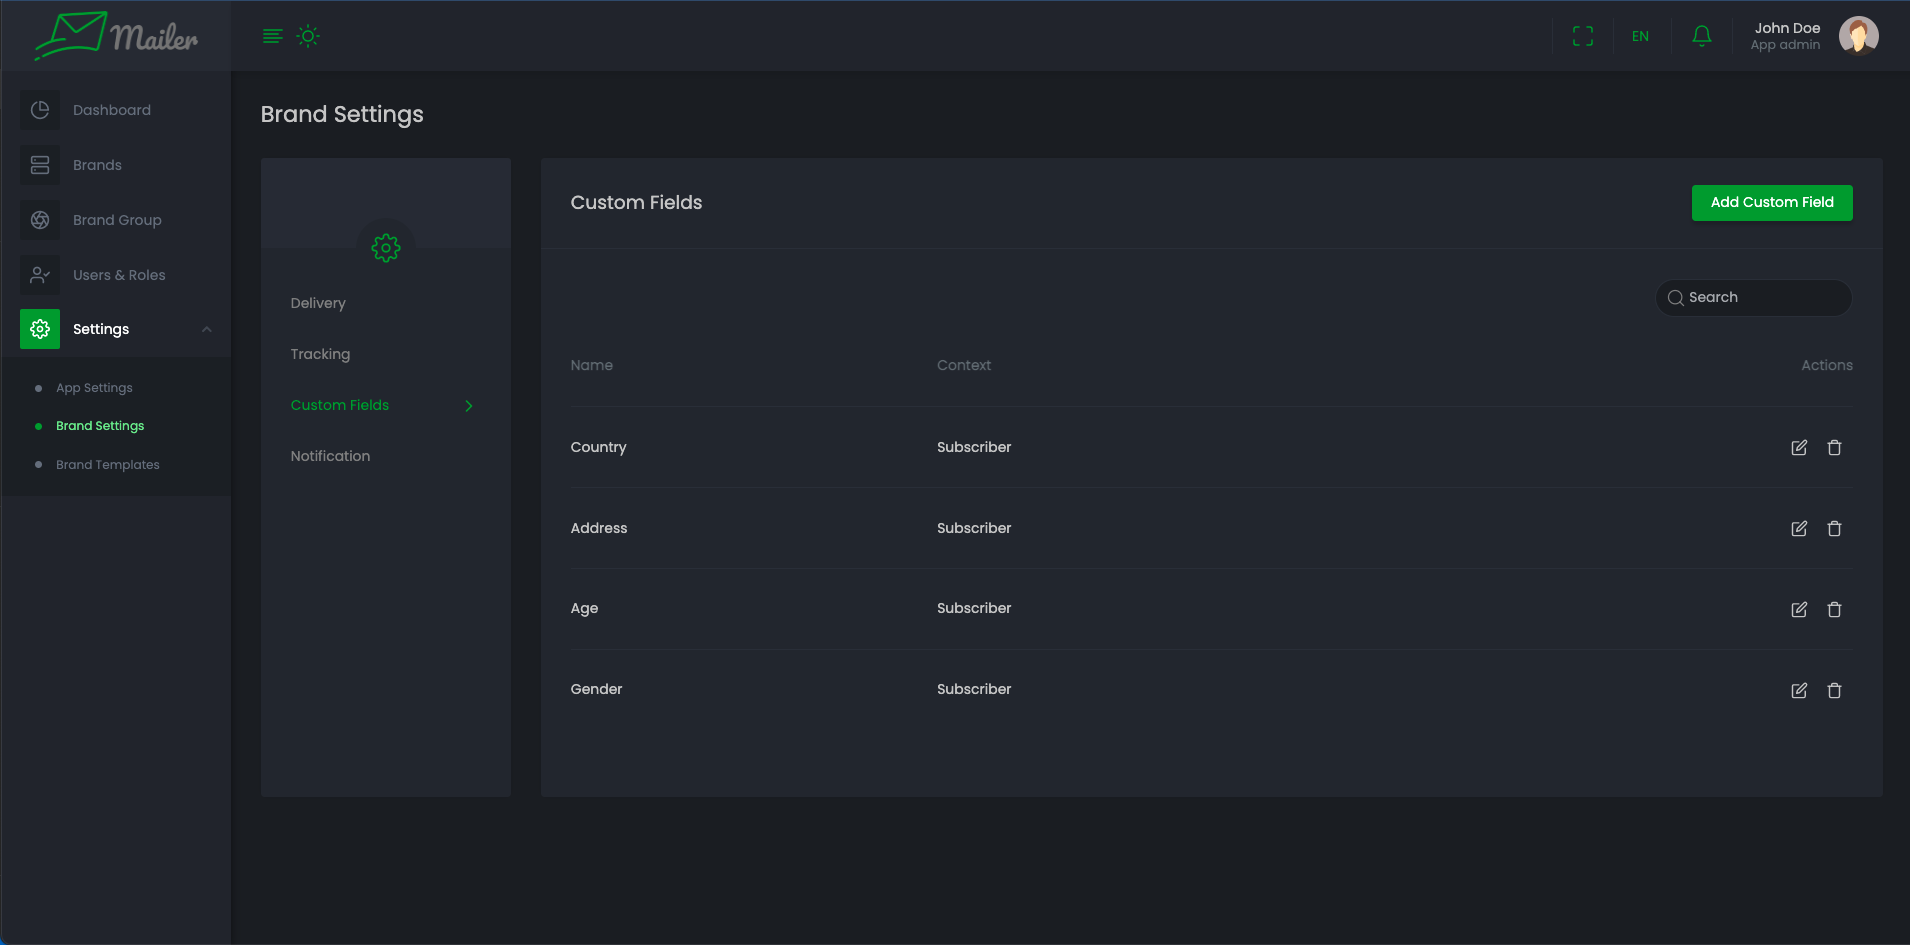
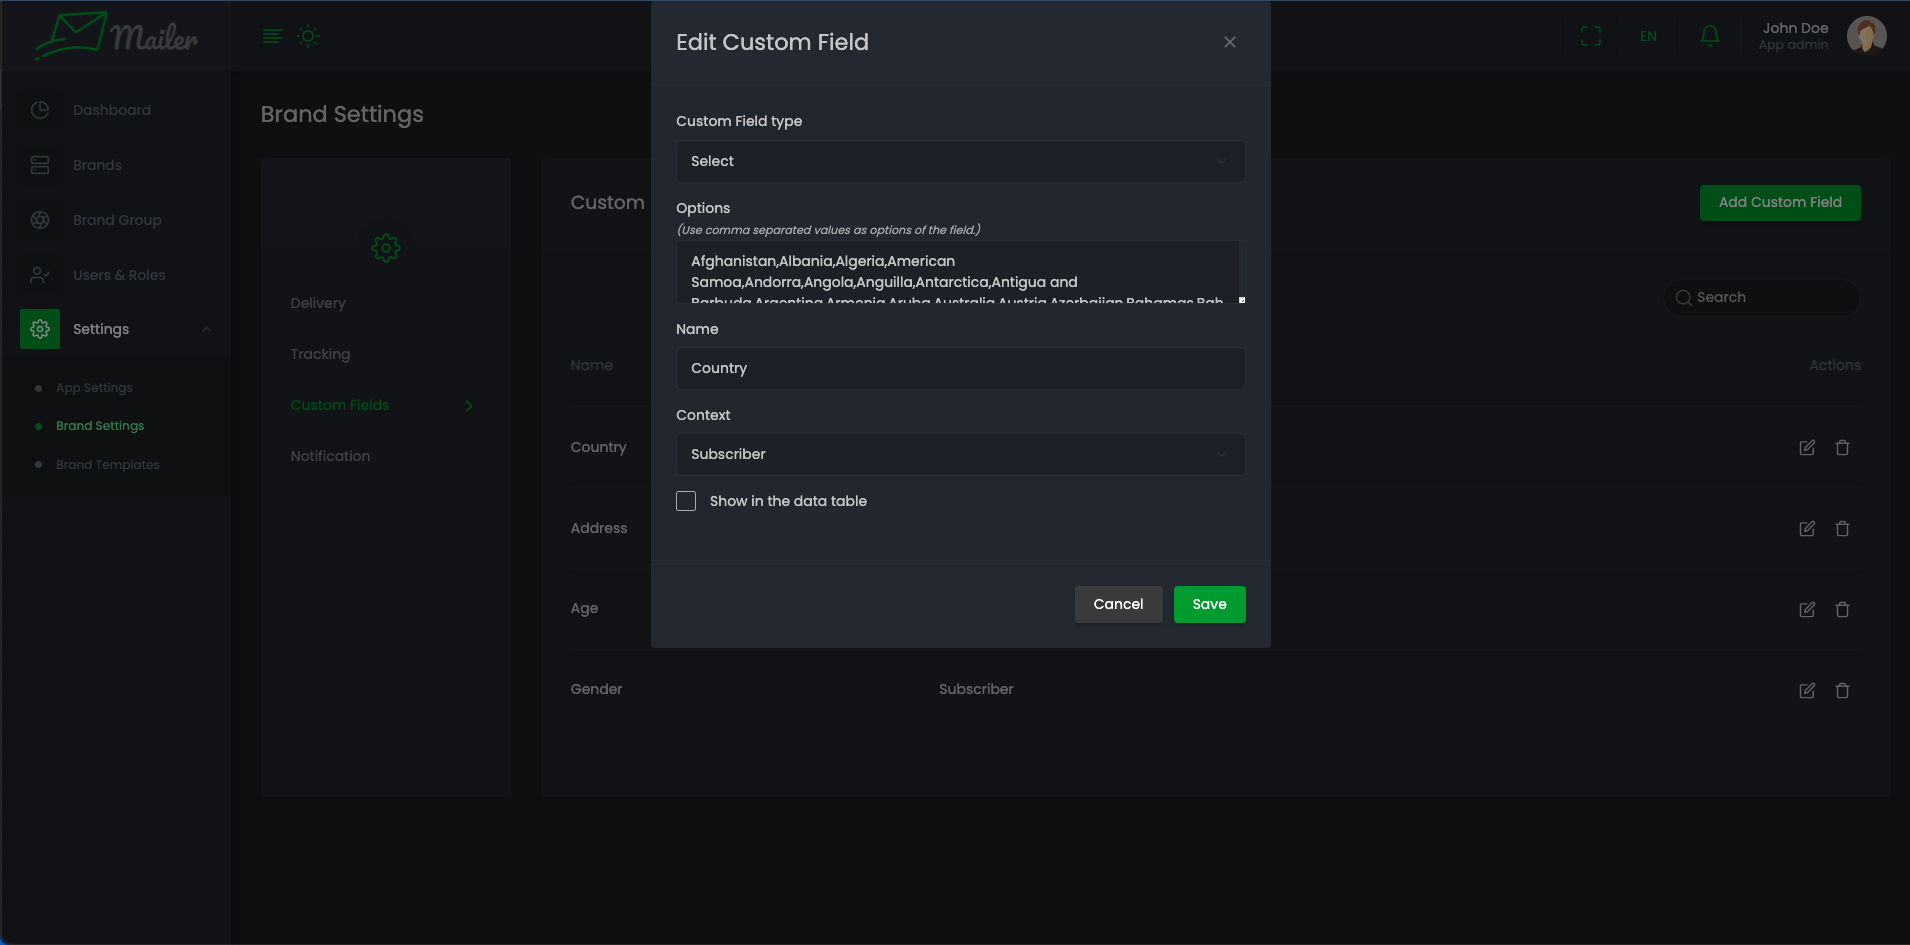
Custom Fields
-
Go to "Settings" > "Brand Setting" > "Custom Fields"
-
To create custom fields. click "Add Custom Fields" button, it will open a modal which reburies custom field type, name and context. If custom field type is 'radio/select' it will ask for options that will be shown as Selectable options.
-
If you want to show this custom field in datatable then you can check 'Show in datatable' checkbox.
-
You can edit any custom fields. If the custom field is not used then you can delete that custom field
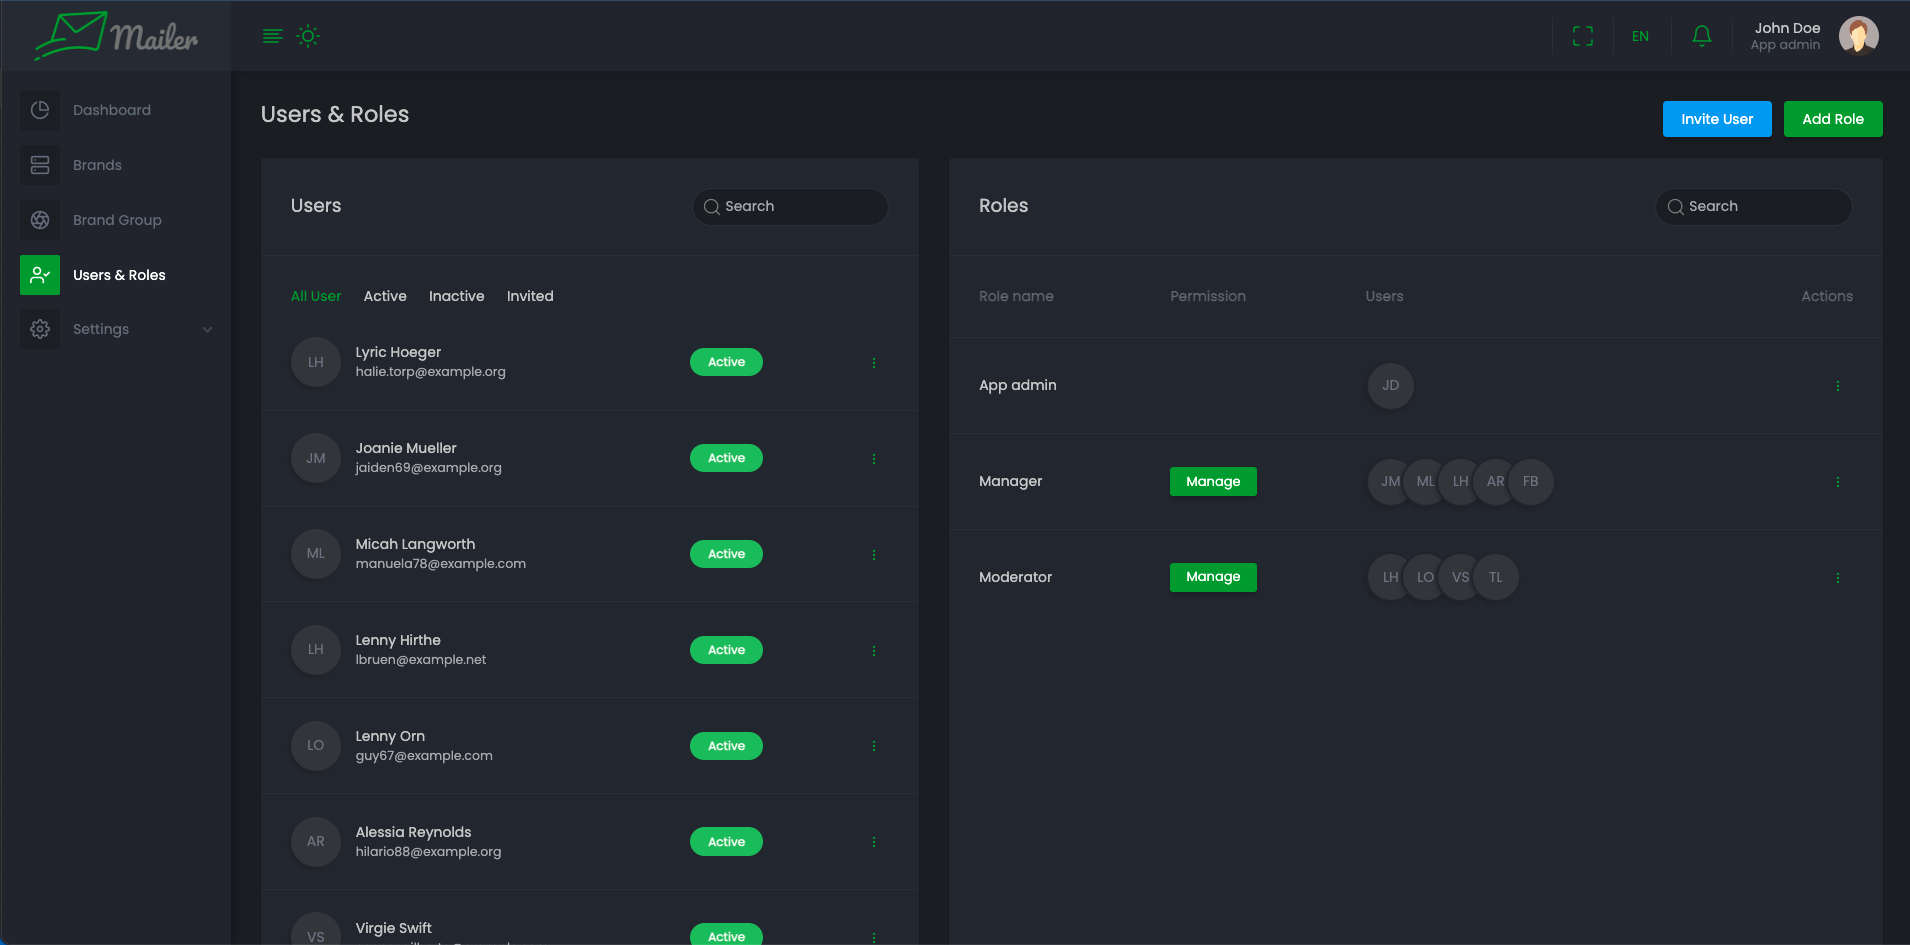
Users & Roles
-
Go to Users & Roles.(User and roles are also available for a specific brand)
-
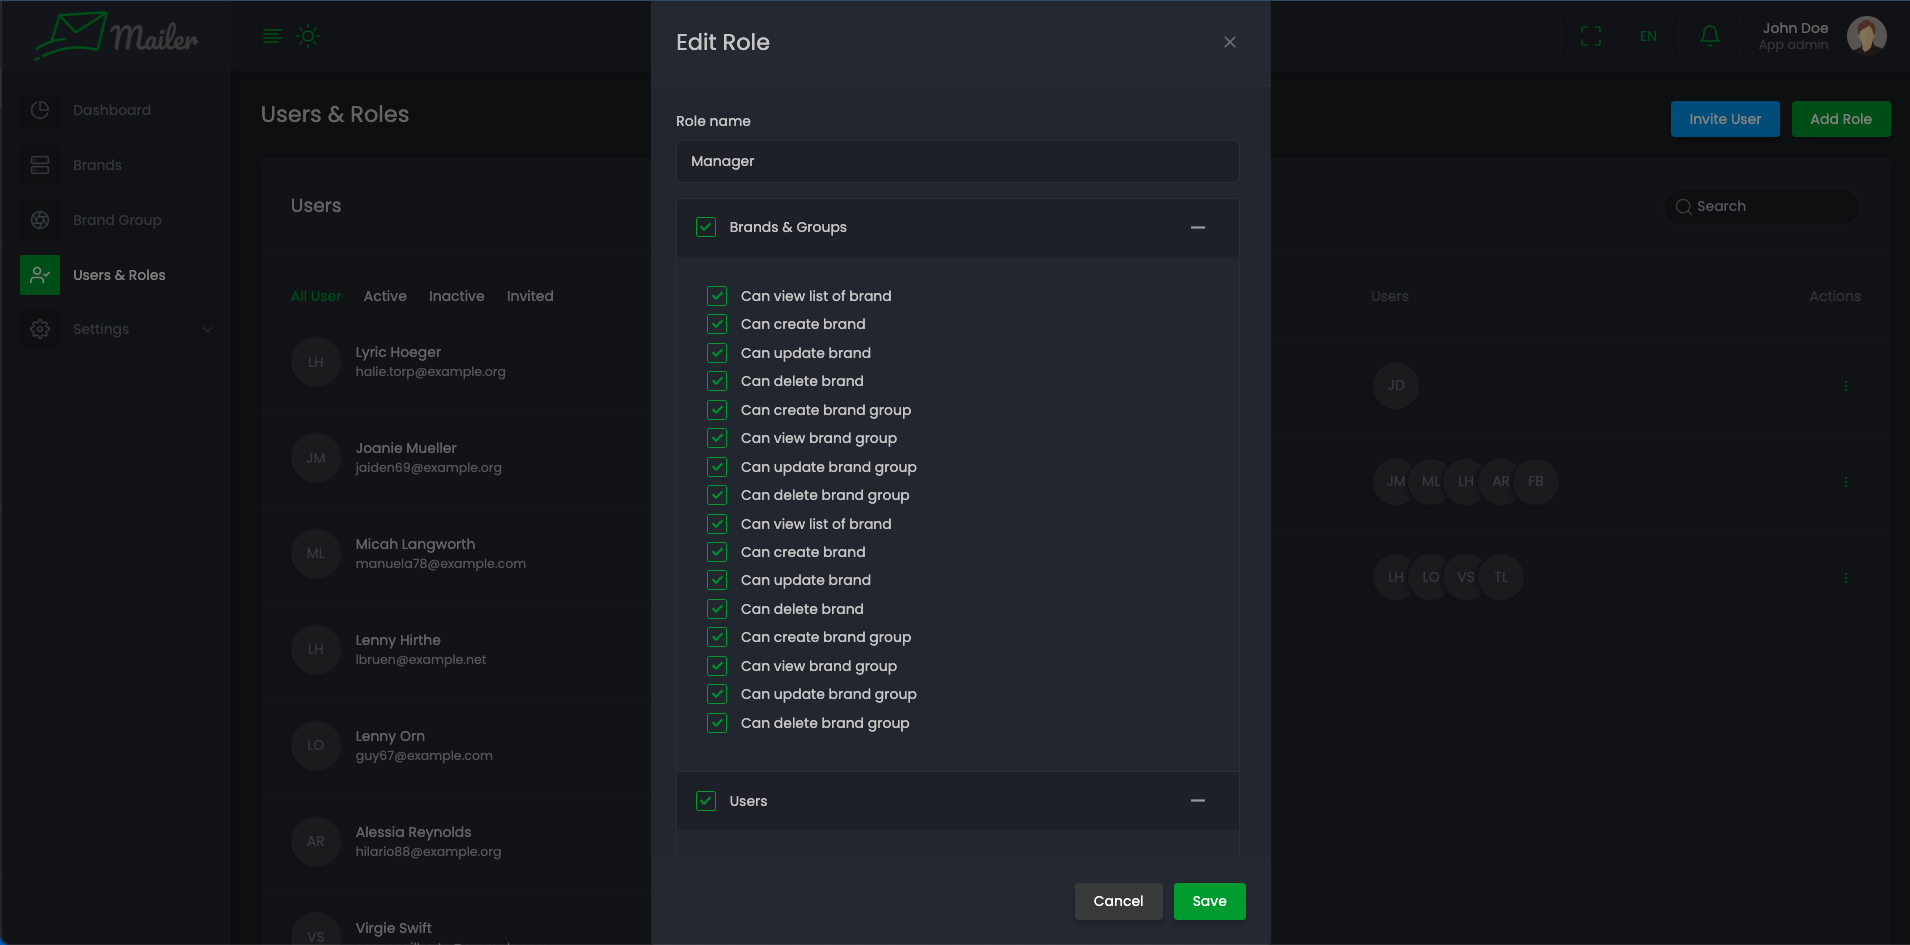
Users and Roles is an important feature in any application. You may need different roles for different brands. For that you have to create roles as you required and gives them permission to access.
-
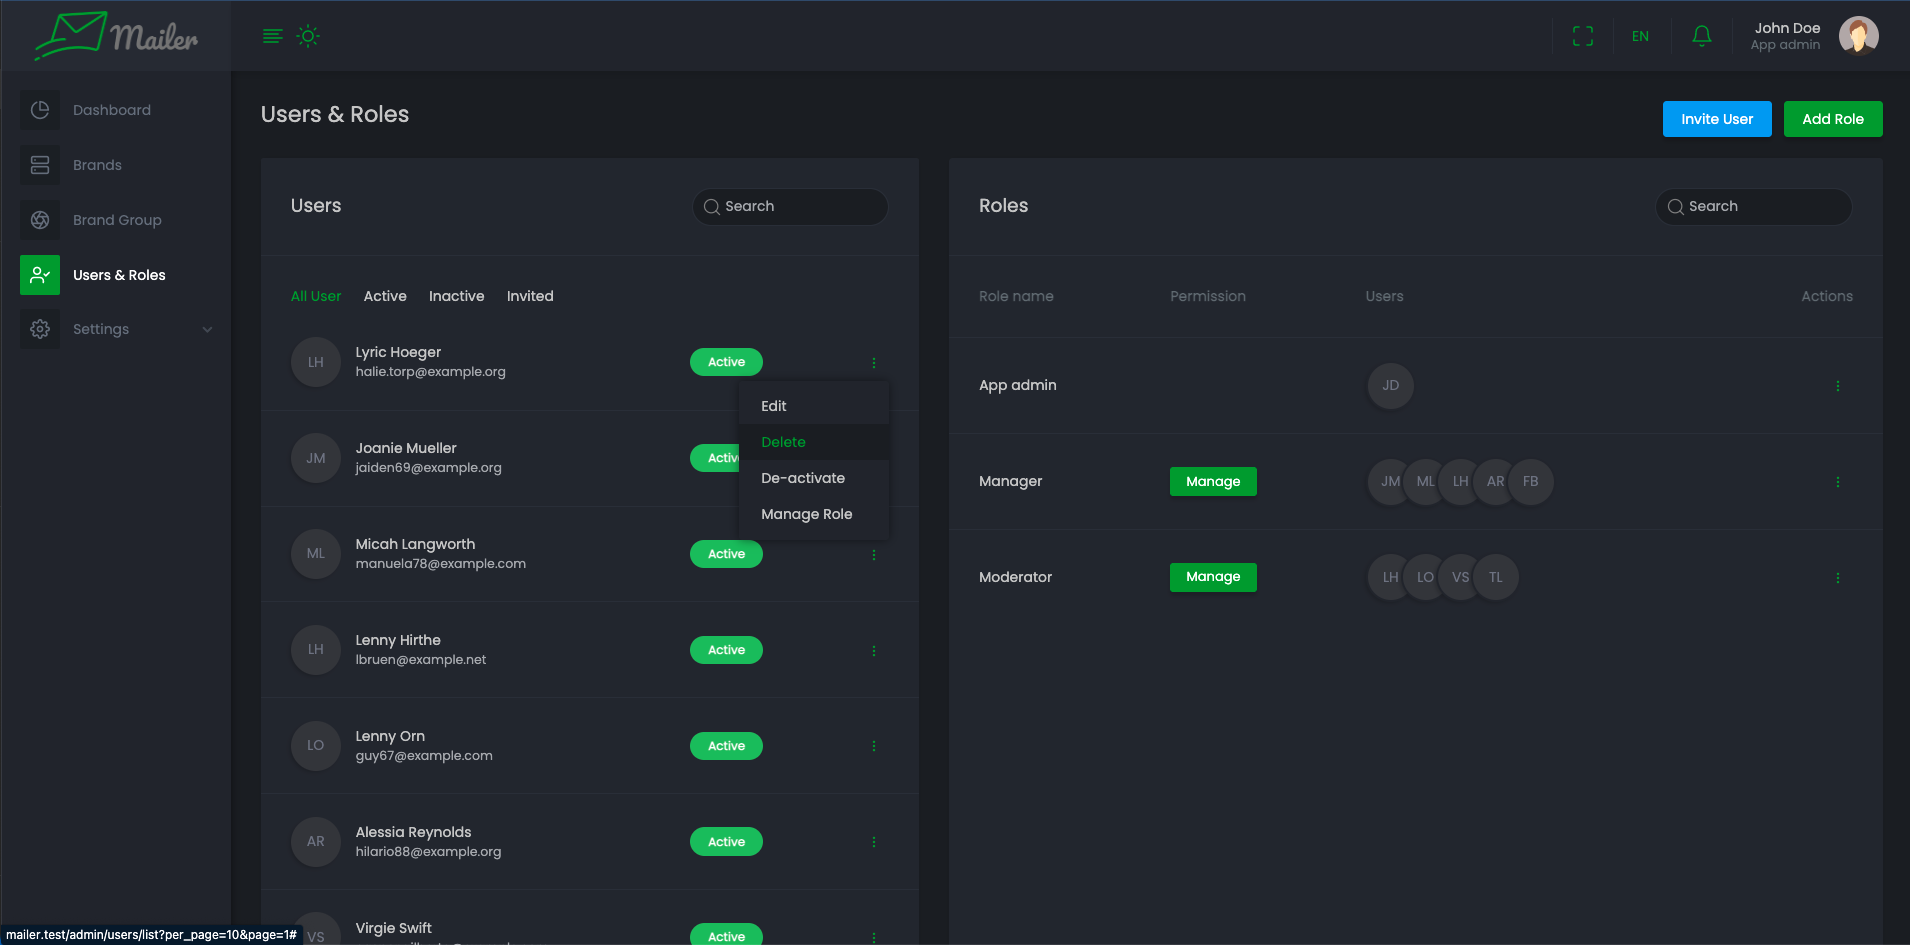
Click on Add Role, It will open a modal which requires Role name and permissions for that role
-
You can manage users of any role by clicking on Manage User of that specific role from Action column.
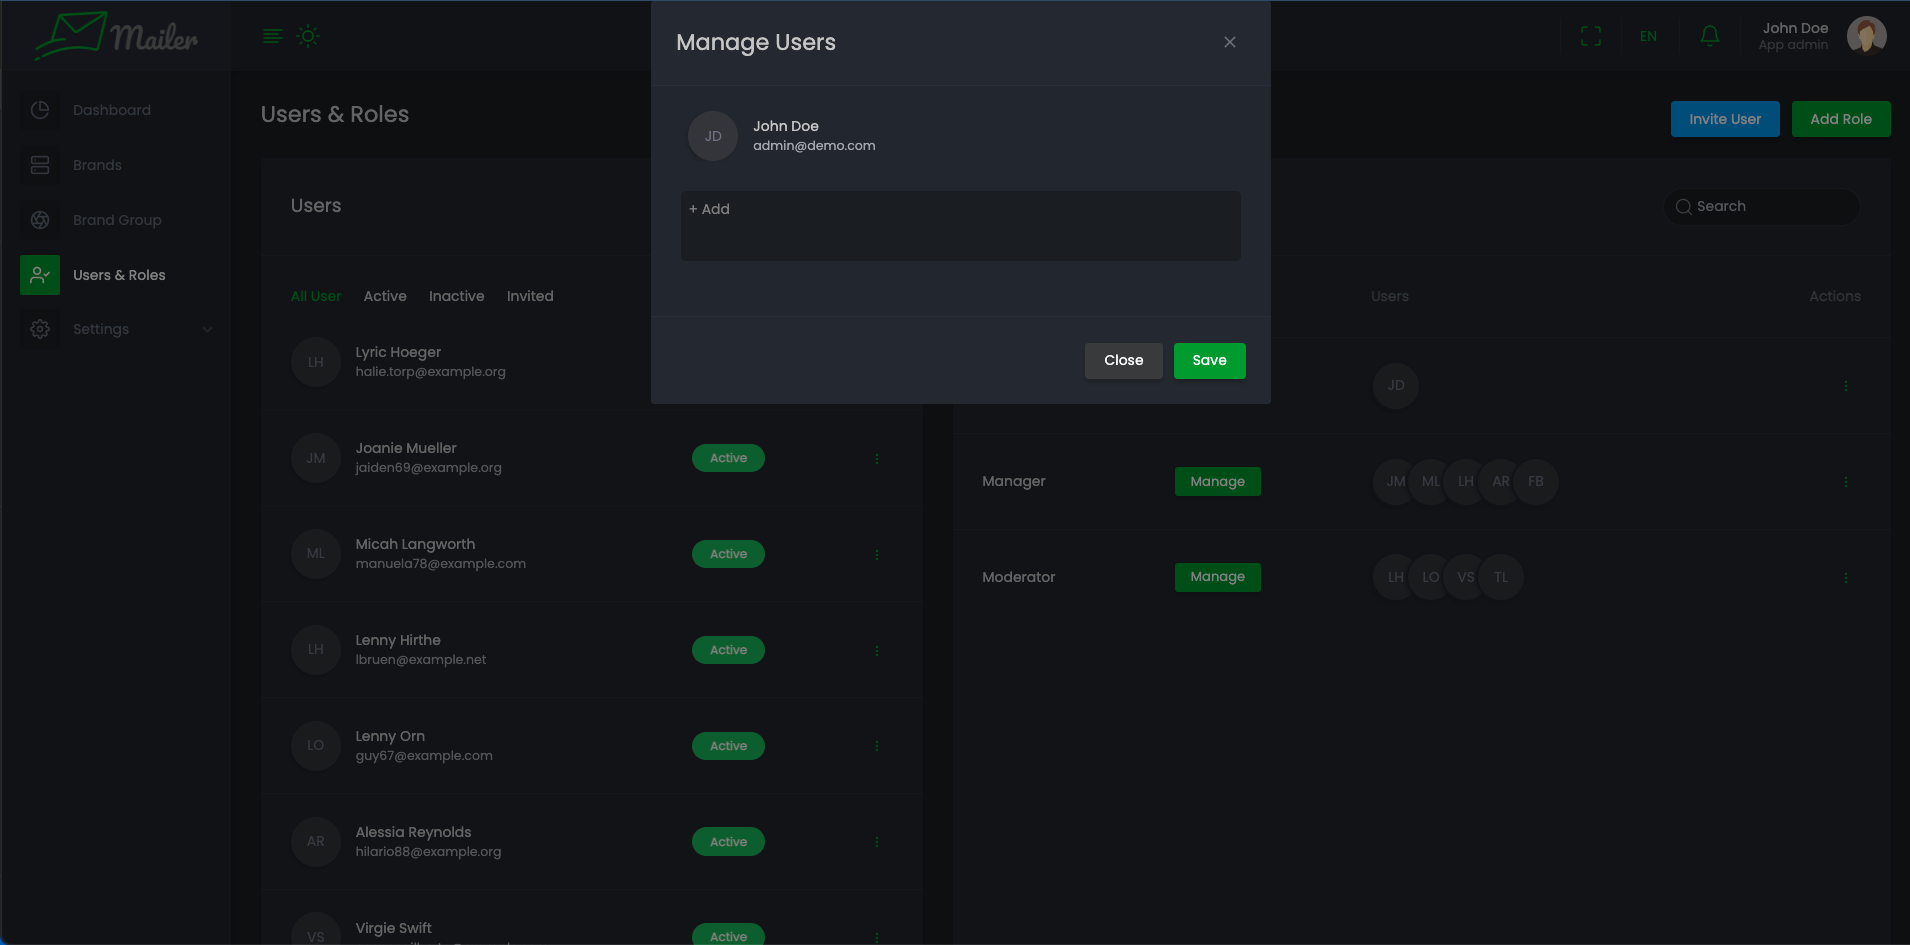
-
You can manage permissions of any role by clicking on Manage of that specific role from "Permission" column.
-
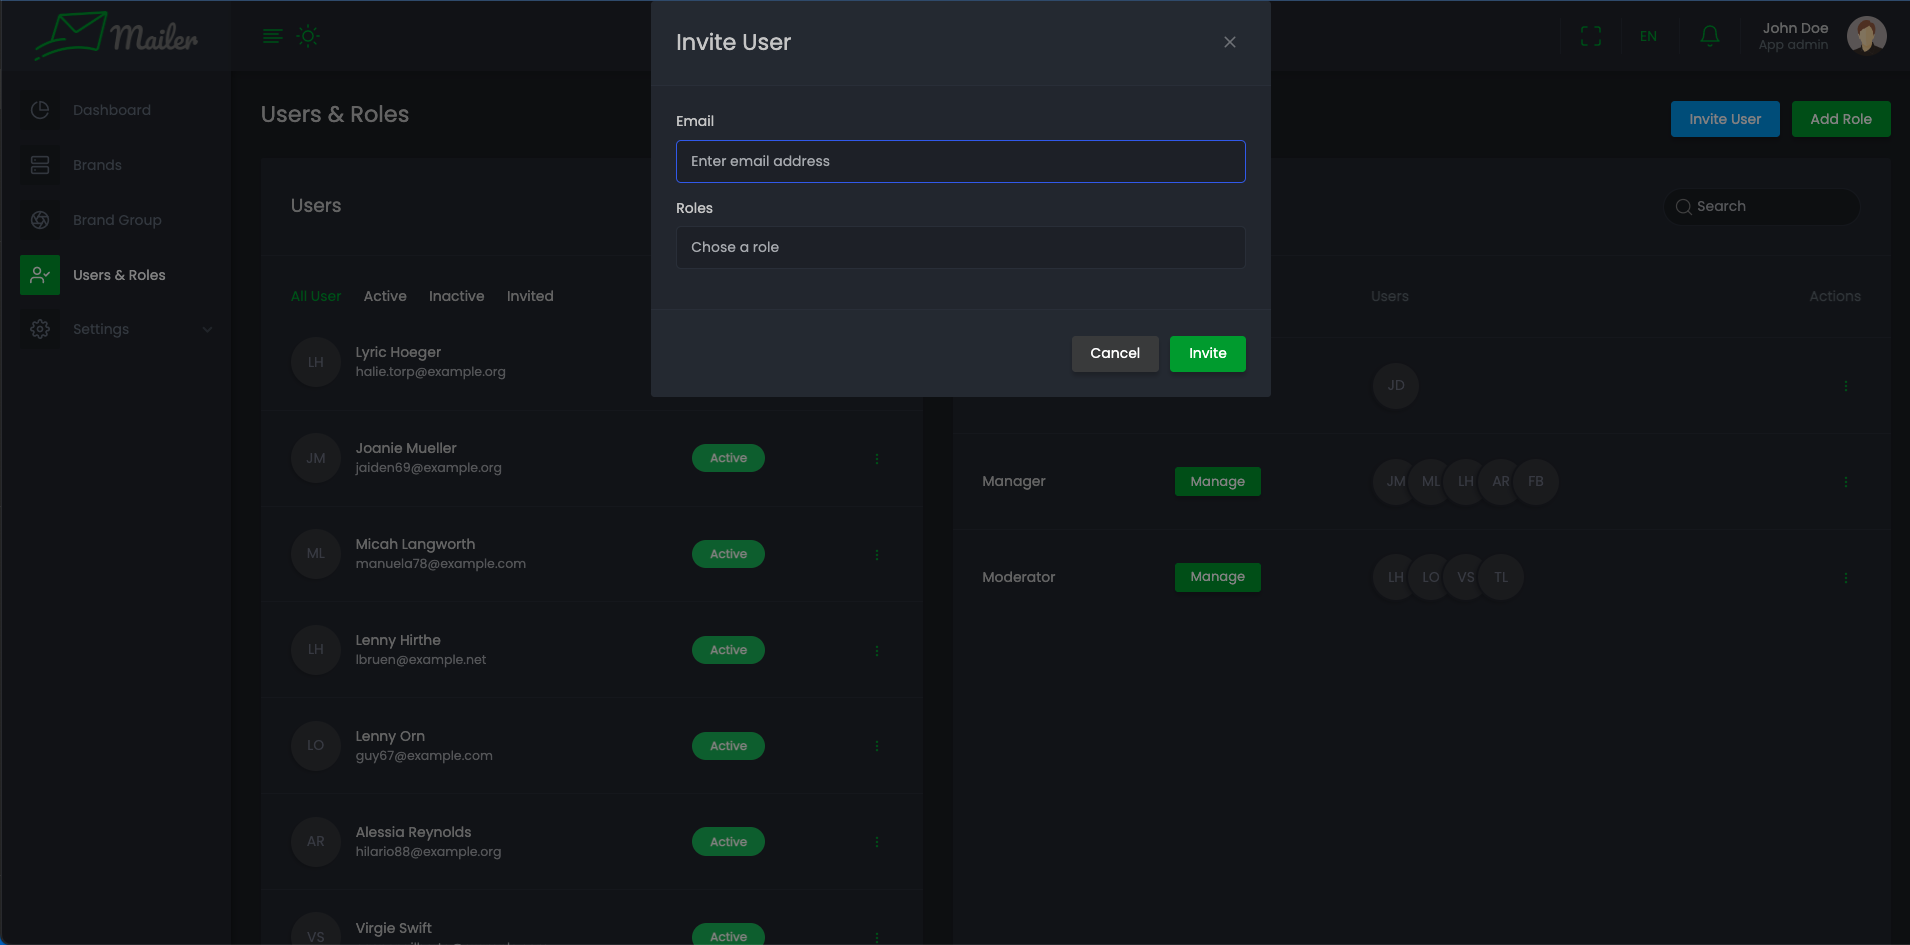
Click on Invite User, It will open a modal that requires user email, and role that will assigned to that user. Invited user will get an confirmation email with a link. That link will redirect to a page where user can set their basic information.
-
You can change user status, manage roles, edit and delete of specific users.
Brand Group
You may have many Brand Groups. All branch setting is here
-
You can create new brand group.
-
Edit brand group name, and also delete.
Brands
-
You will see list of Brands here
-
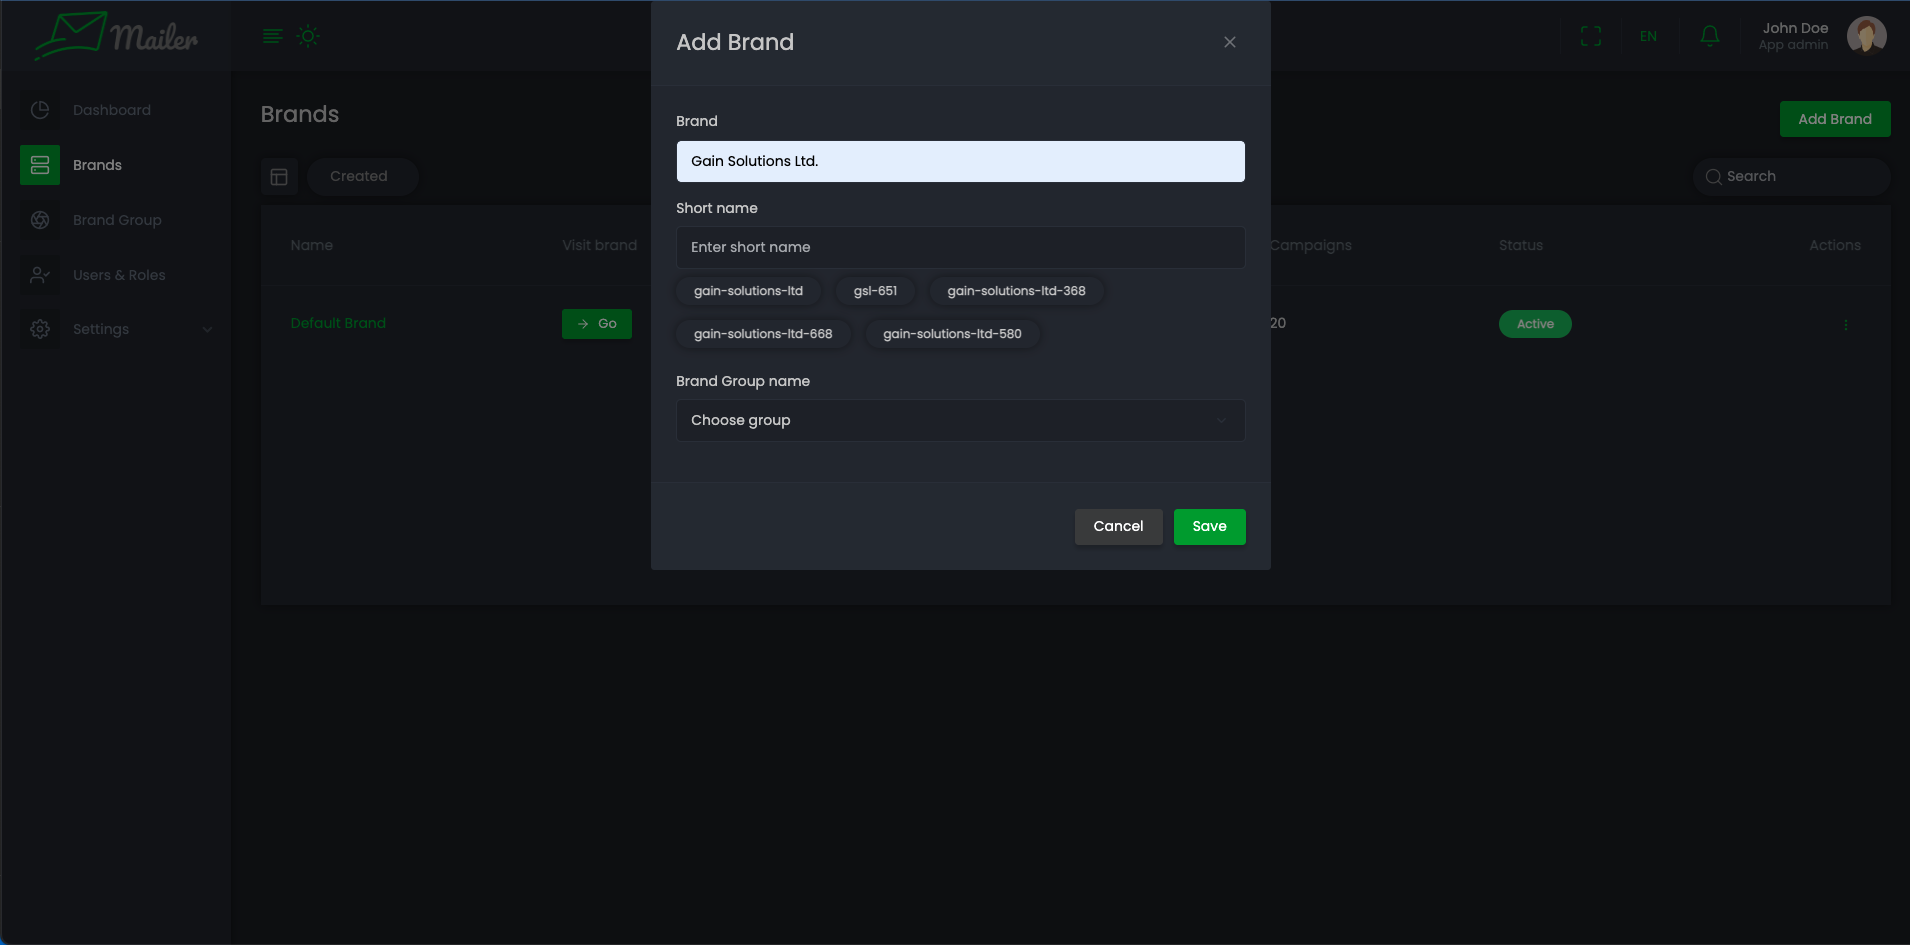
You can create a new brand. Type a name of brand on name text box. It will recommend some brand's unique short name. Select a short name or change the way you want. One a Brand is been created you can't change the short_name.
-
You can, Edit and Delete any brand by clicking on the specific brand action menu.
-
You can click on Click button or on Brand's name to enter the dashboard of that Brand
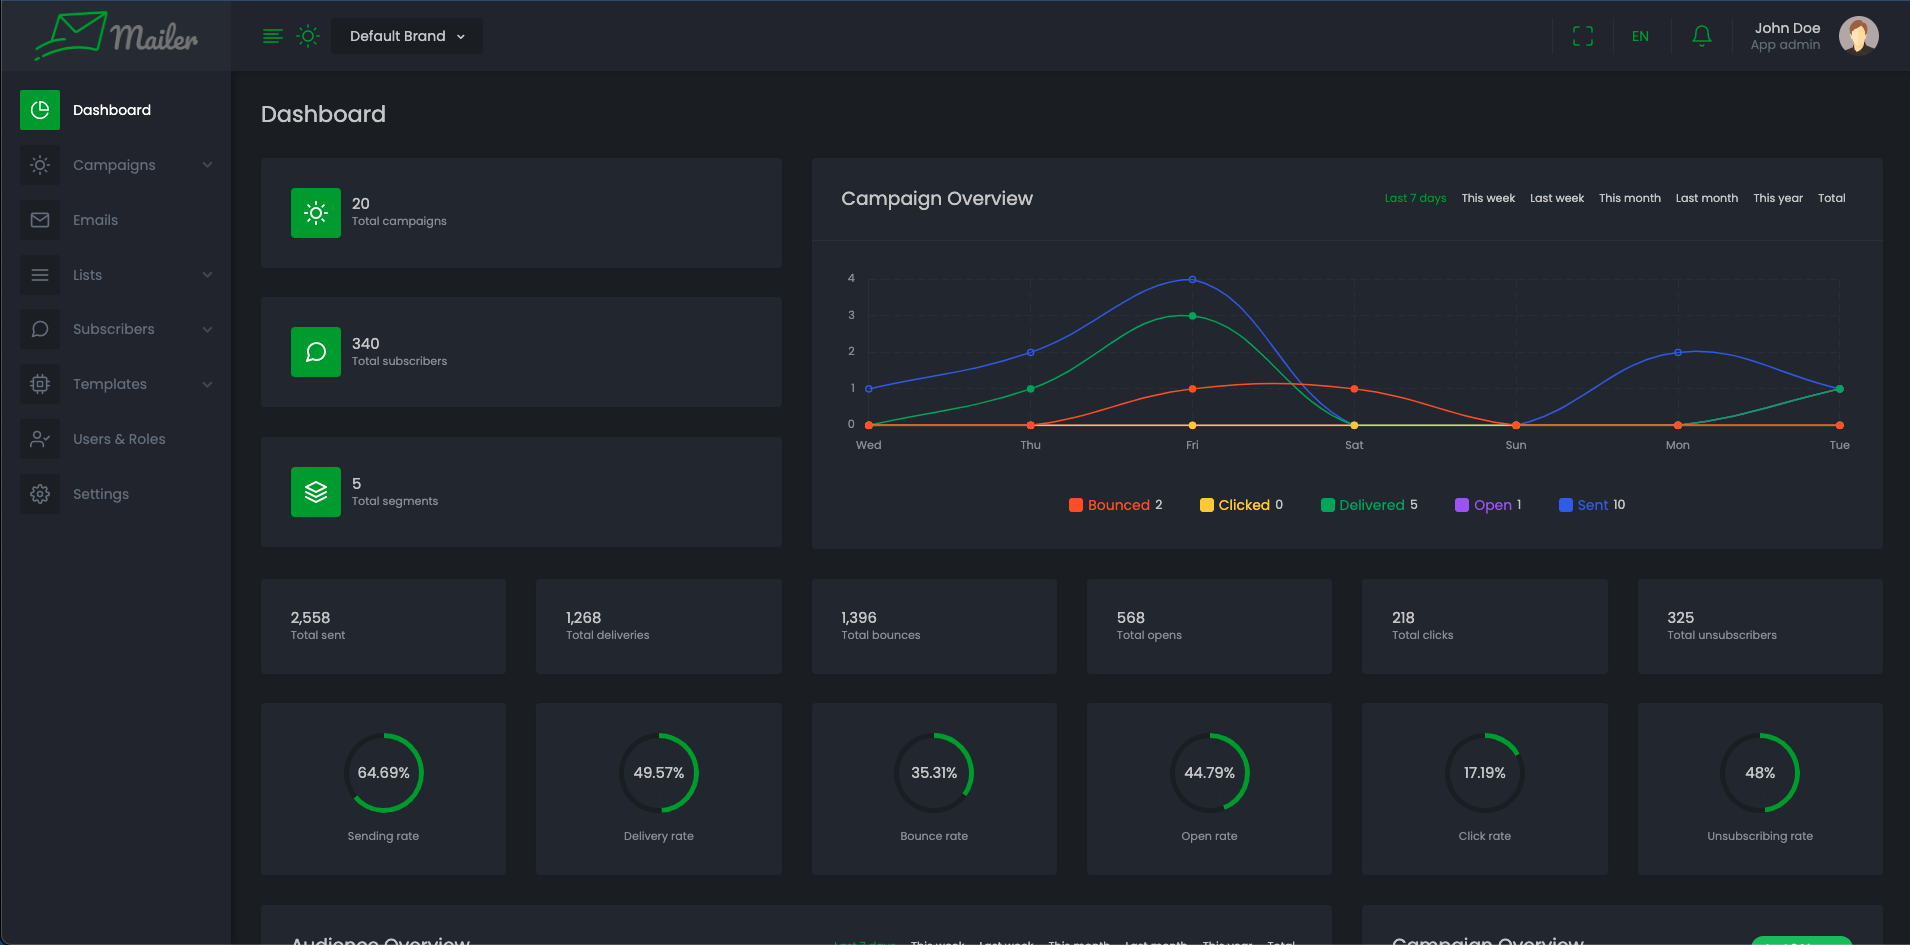
Dashboard
-
Count of total campaigns, total subscribers, total brands
-
You can see Total sent emails count, Total deliveries count, Total bounces count, Total open count, Total clicks count, Total subscribers and unsubscribes count. Which is based on all brands gross email logs statistics.
-
You can see Sending rate, Delivery rate, Bounce rate, Open rate, Click rat. which is based on rate of all brands email logs.
-
You can see Campaign Overview, Audience Overview, Last 24 Hours Campaign Overview of all brands.

Usage of Brand level
Settings
-
Go to "Settings" > "Delivery" and change it if you don't want to use app level settings provided by admin.
-
Go to "Settings" > "Custom Field" and you can add more custom field if you want more custom fields. These will appear with app level custom fields.
-
Go to "Settings" > "Notification" and you can change the notification audiences for the brand
-
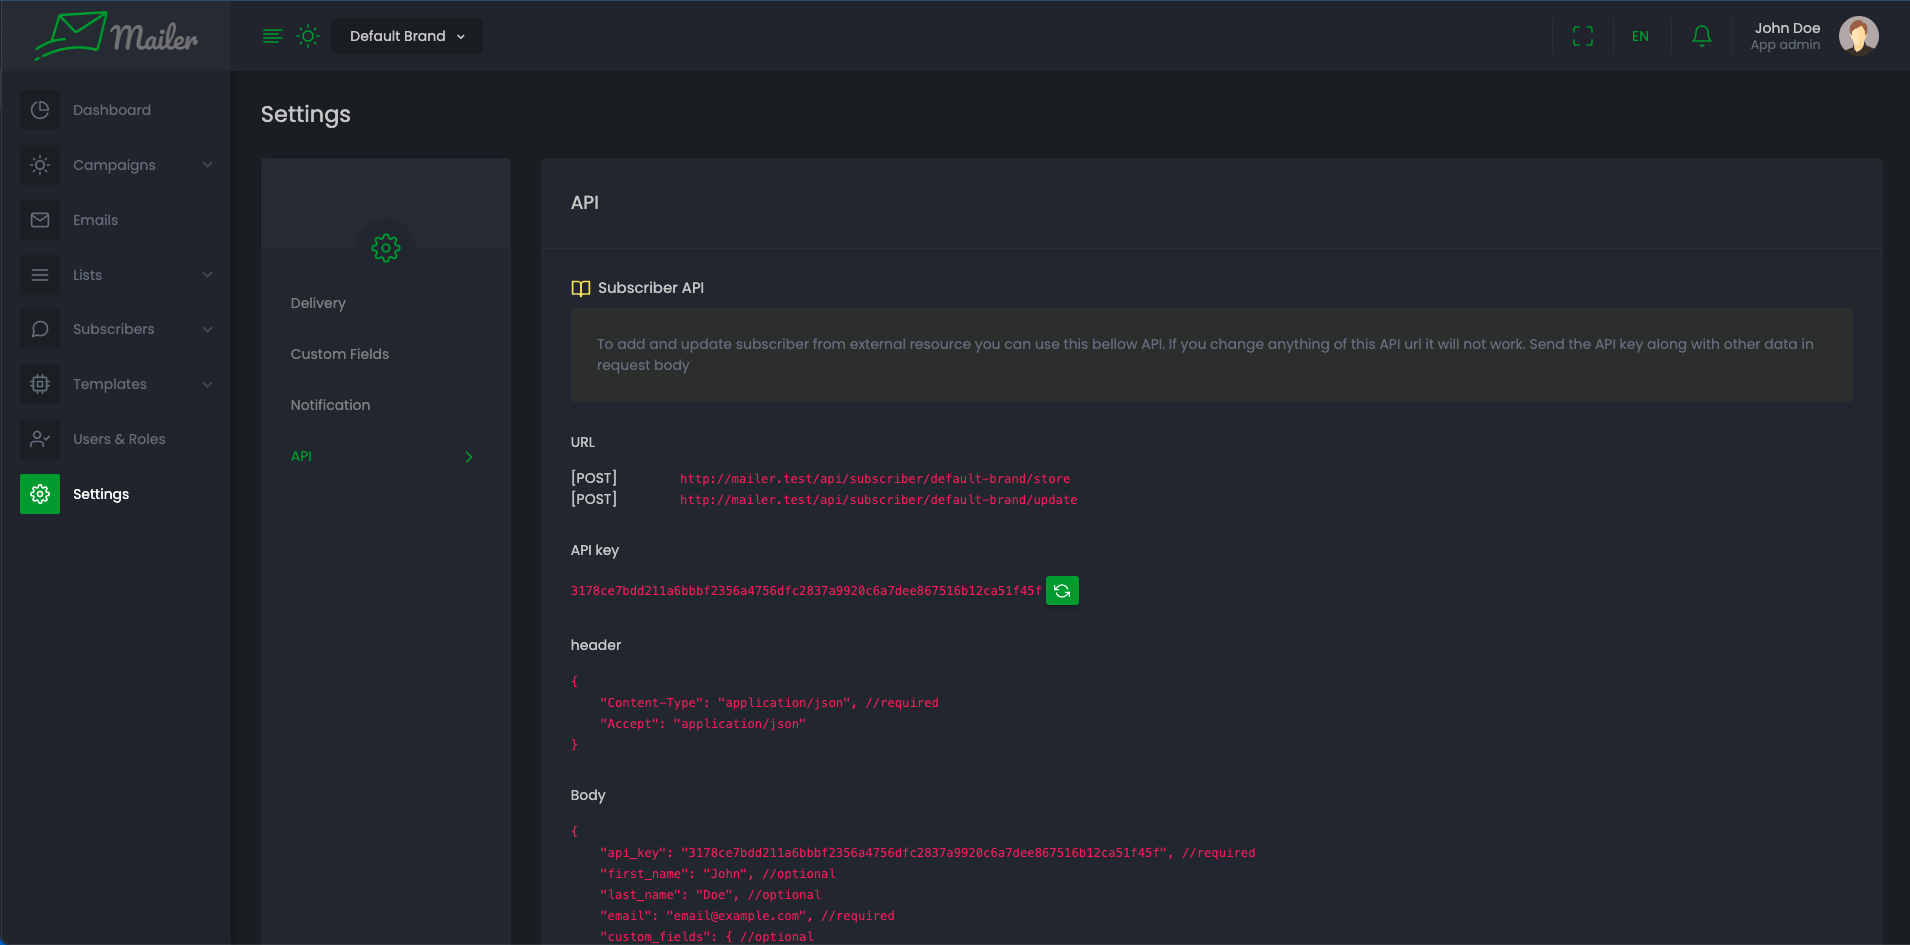
Go to "Settings" > "Api": You will find the api URL, Header and Body to add subscriber from external resources like, Postman, Insomnia or any client side Application.
Subscribers
All Subscribers
-
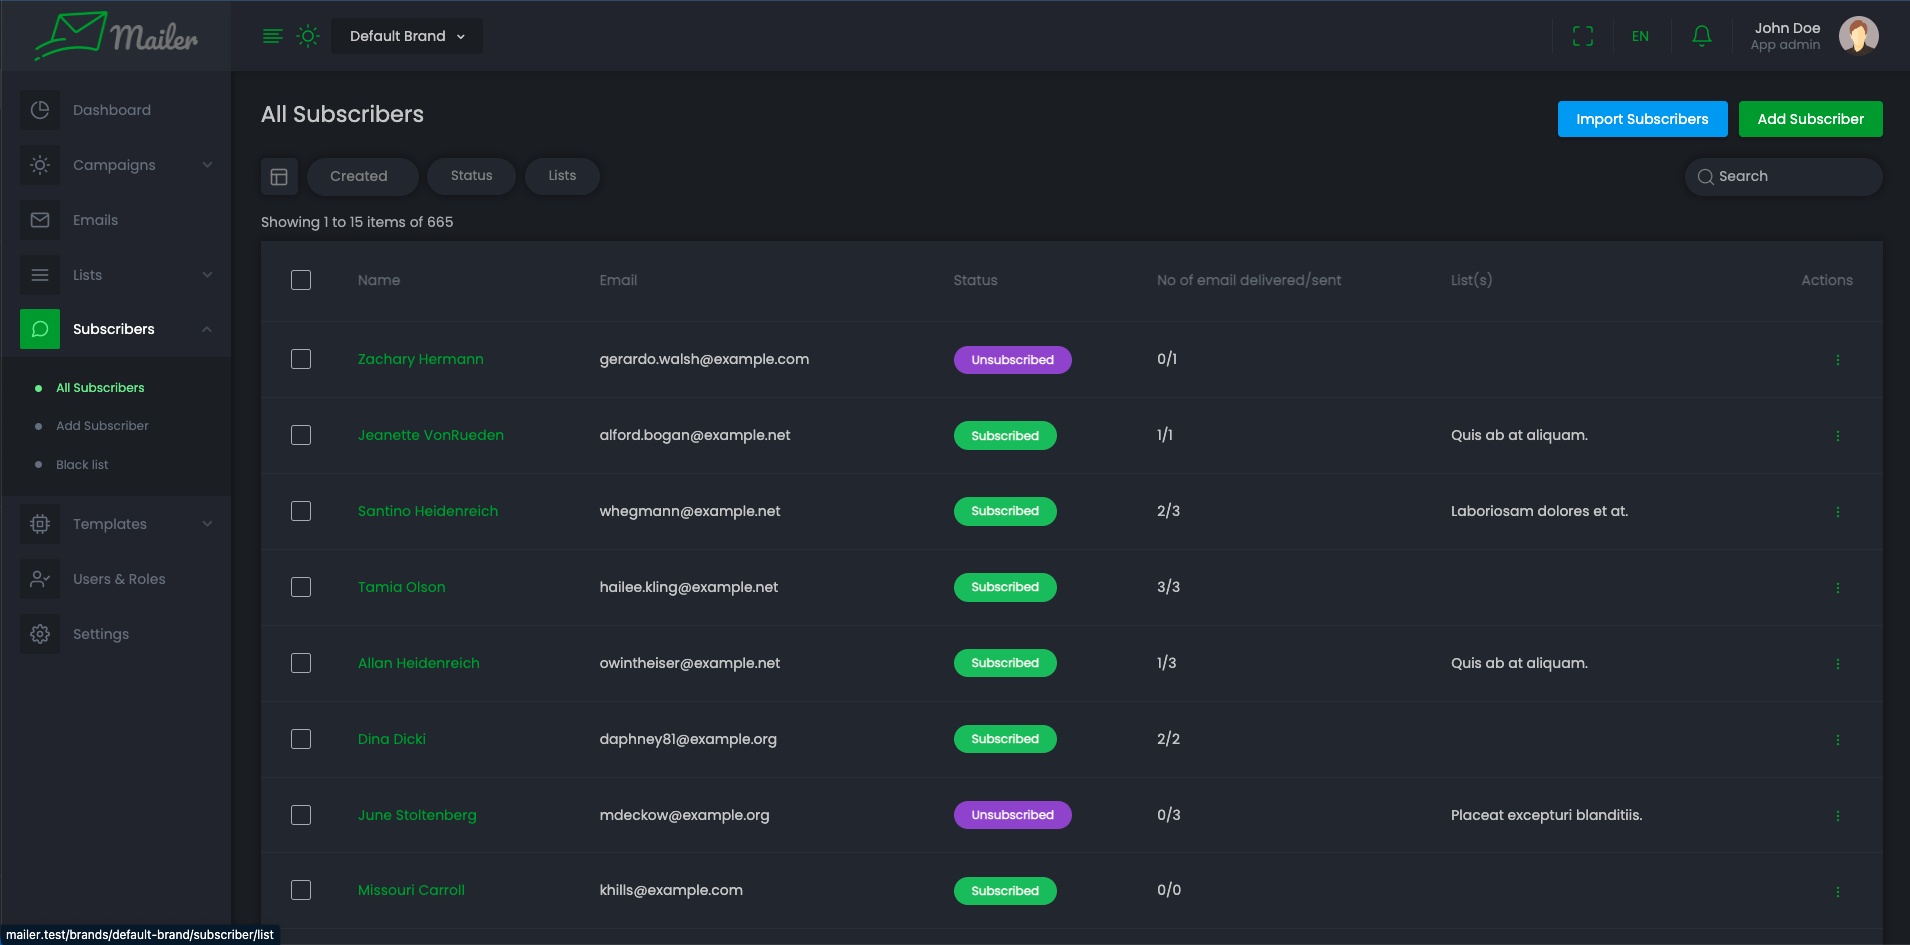
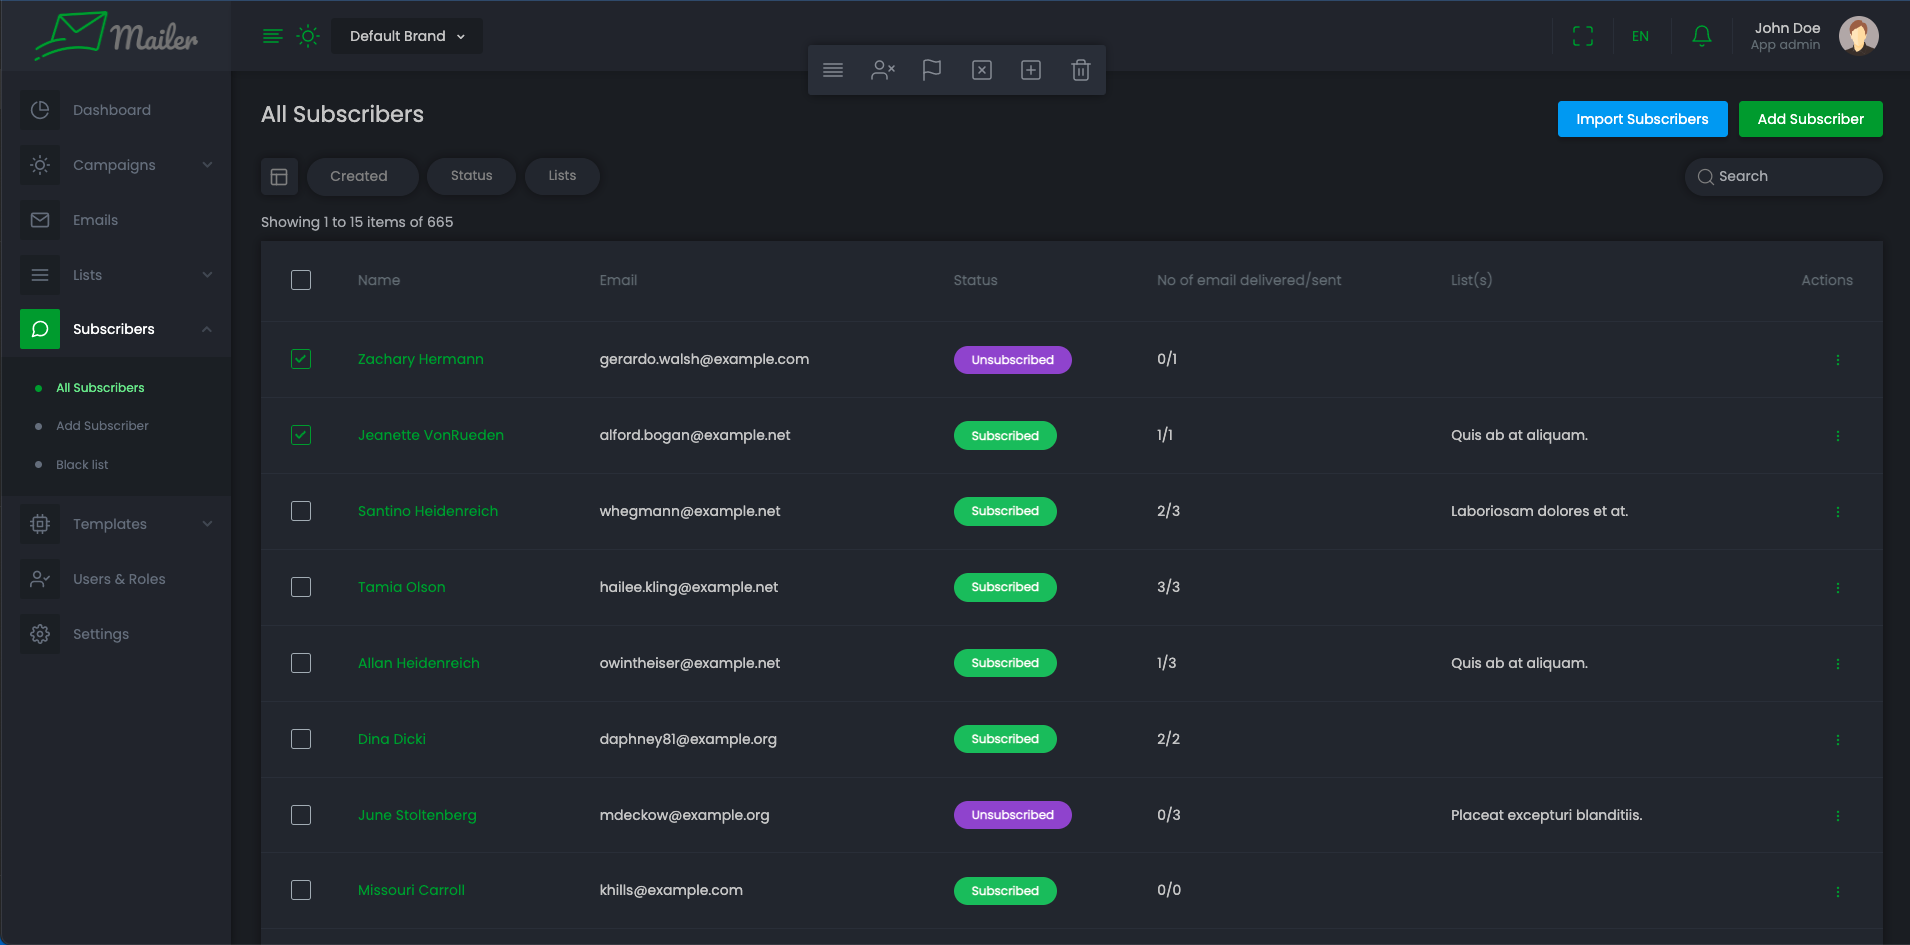
Go to "Subscribers" > "All subscribers" and you can see list of subscribers.
-
Subscribers can be filtered with created date, current status, list which is assigned to subscribers. Also you can search subscribers.
-
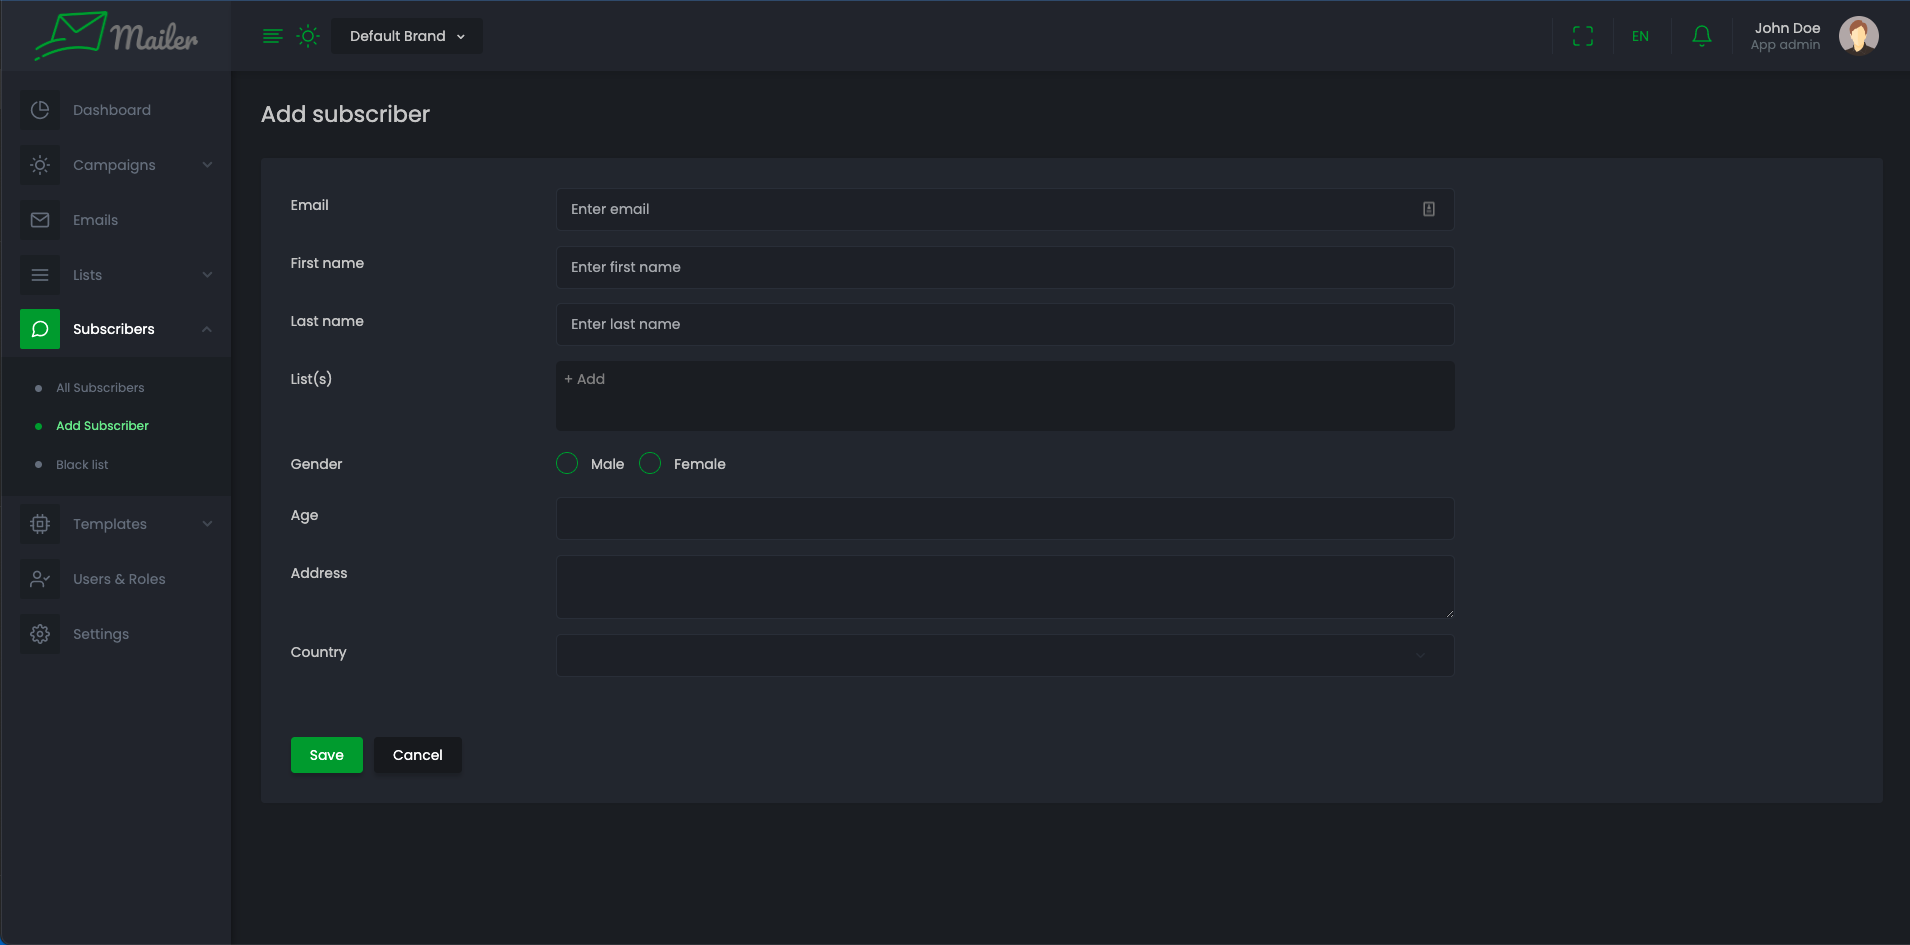
You can create a new subscribers. Click Add Subscriber. Fill at least subscriber email to create a new subscriber.
-
-
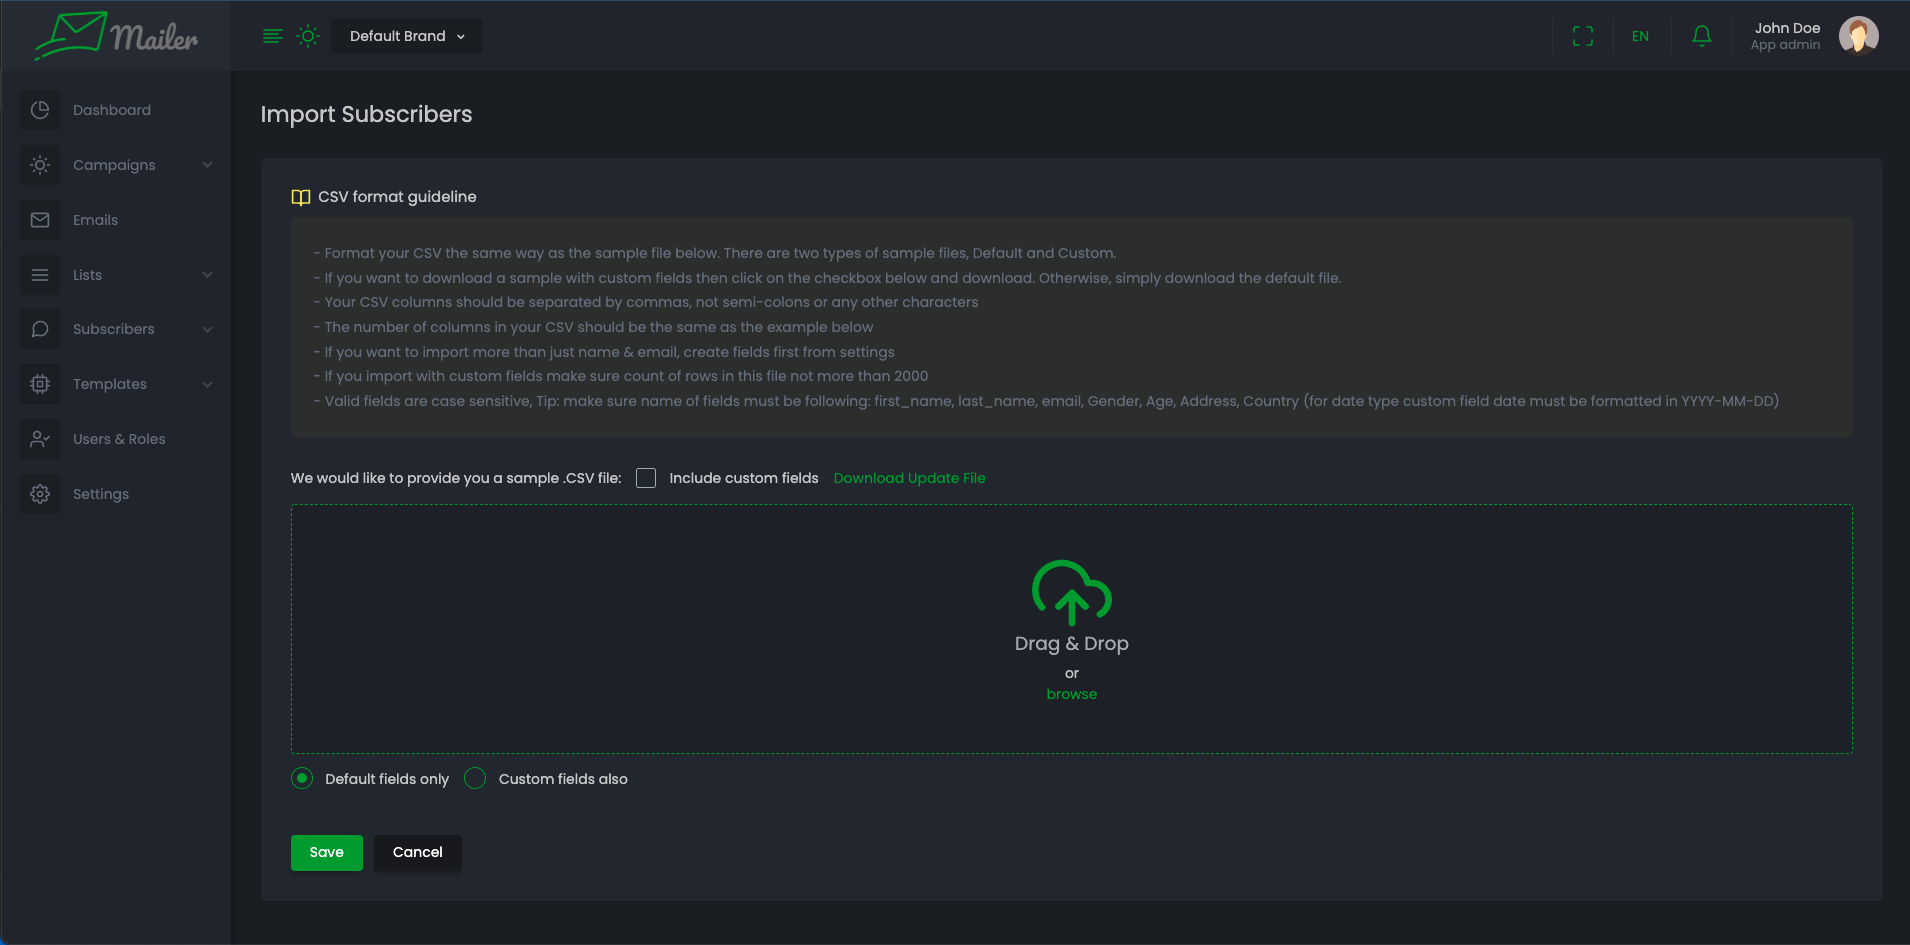
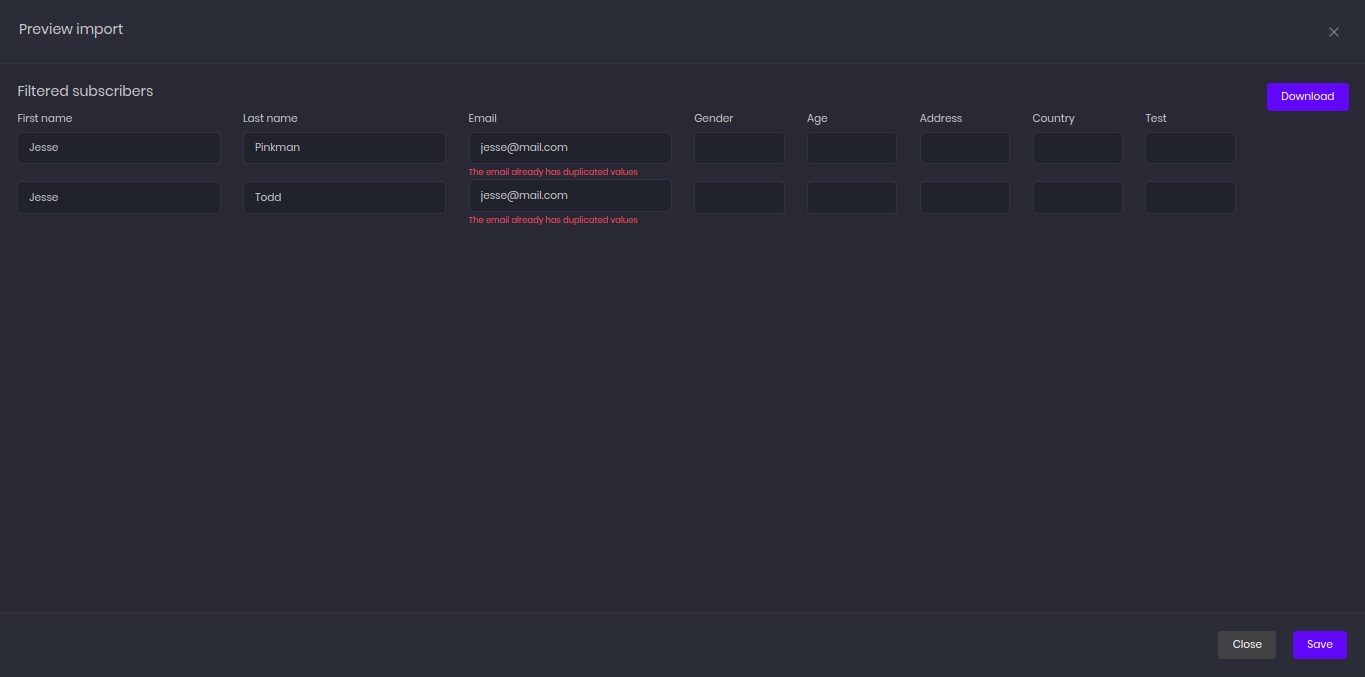
You can import subscribers through CSV file. Click Import Subscribers. Download a sample file. If you want to import subscribers with custom fields then check Include custom fields then click Download to download the file. Structure your csv in same structure of sample. And choose this file or drag and drop.
-
After submitting subscribers will imported into database, If some data has duplicate or missing value or with other issues will raise up within a modal where you can download the subscribers with issues.
-
-
You can, Edit and Delete subscribers specific action menu. (Note: You can't delete subscriber if it has any interaction with email logs.)
-
You can click and checkboxes then you can perform bulk actions from context menu. You can assign a new list and assign subscribers to that. You can add to blacklist, delete. Make their status to subscribed, unsubscribed. You also can add to lists, remove from lists.
Black list
-
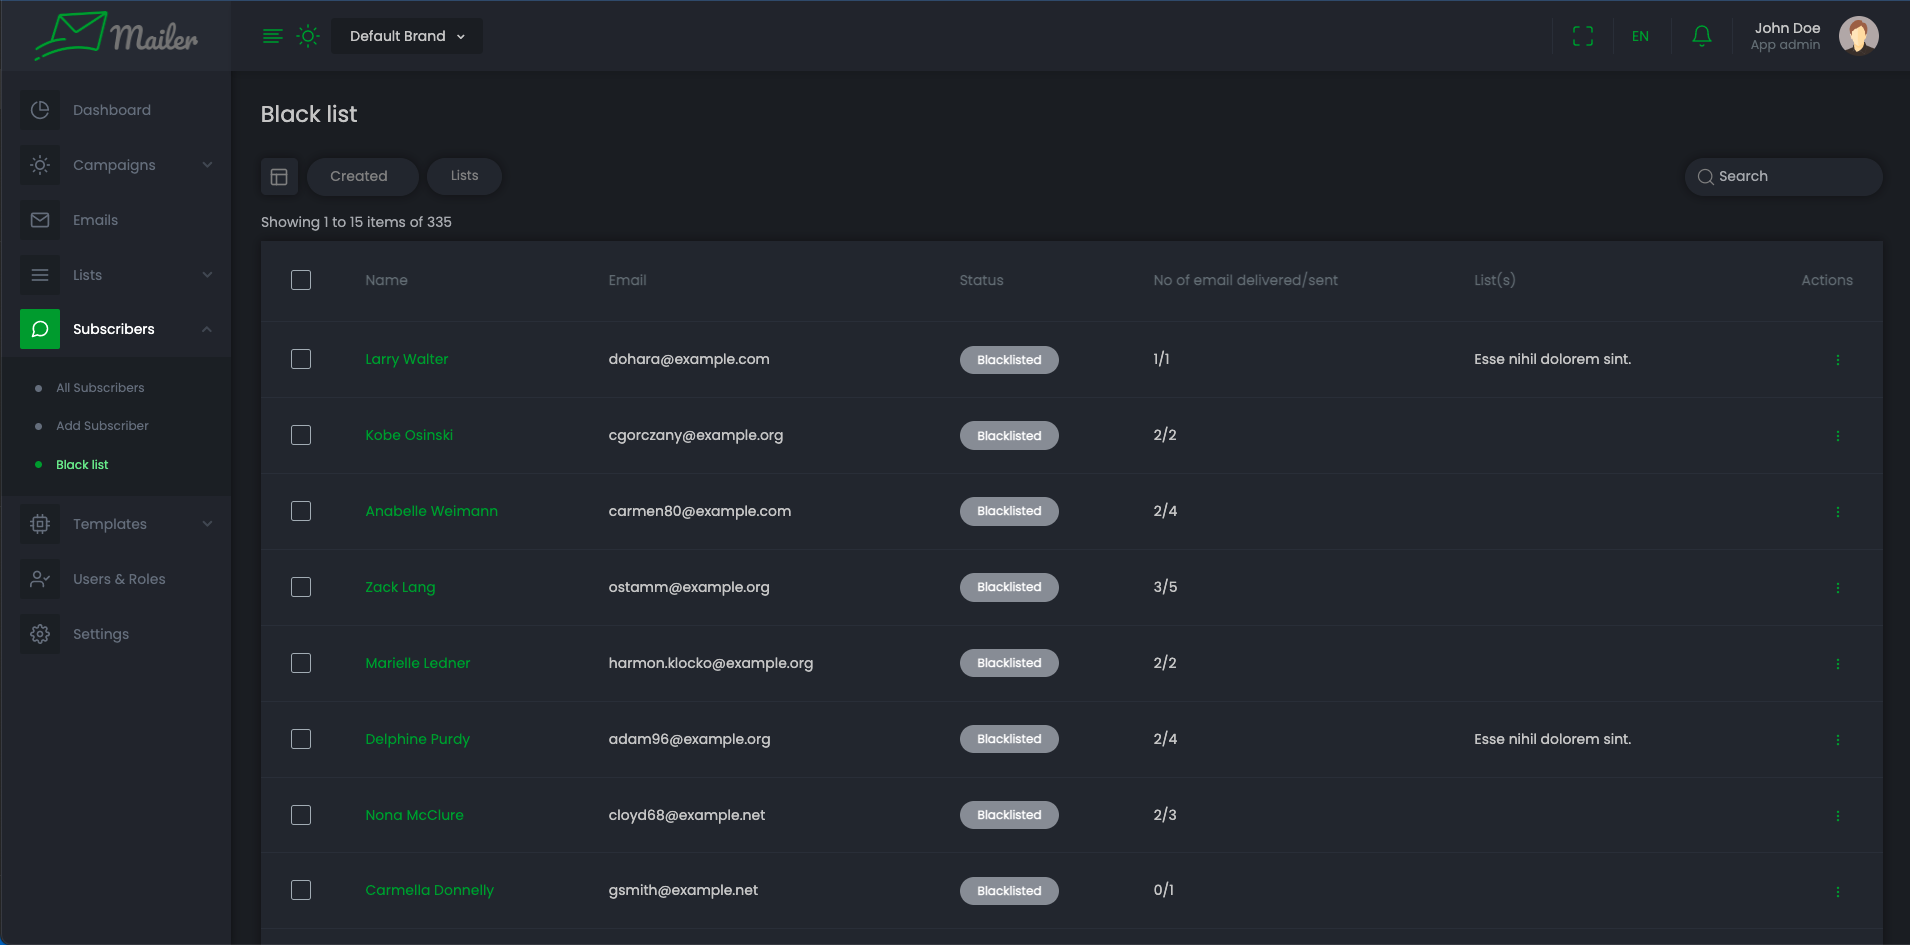
Go to "Subscribers" > "Black list" and you can see blacklisted subscribers.
Segments
-
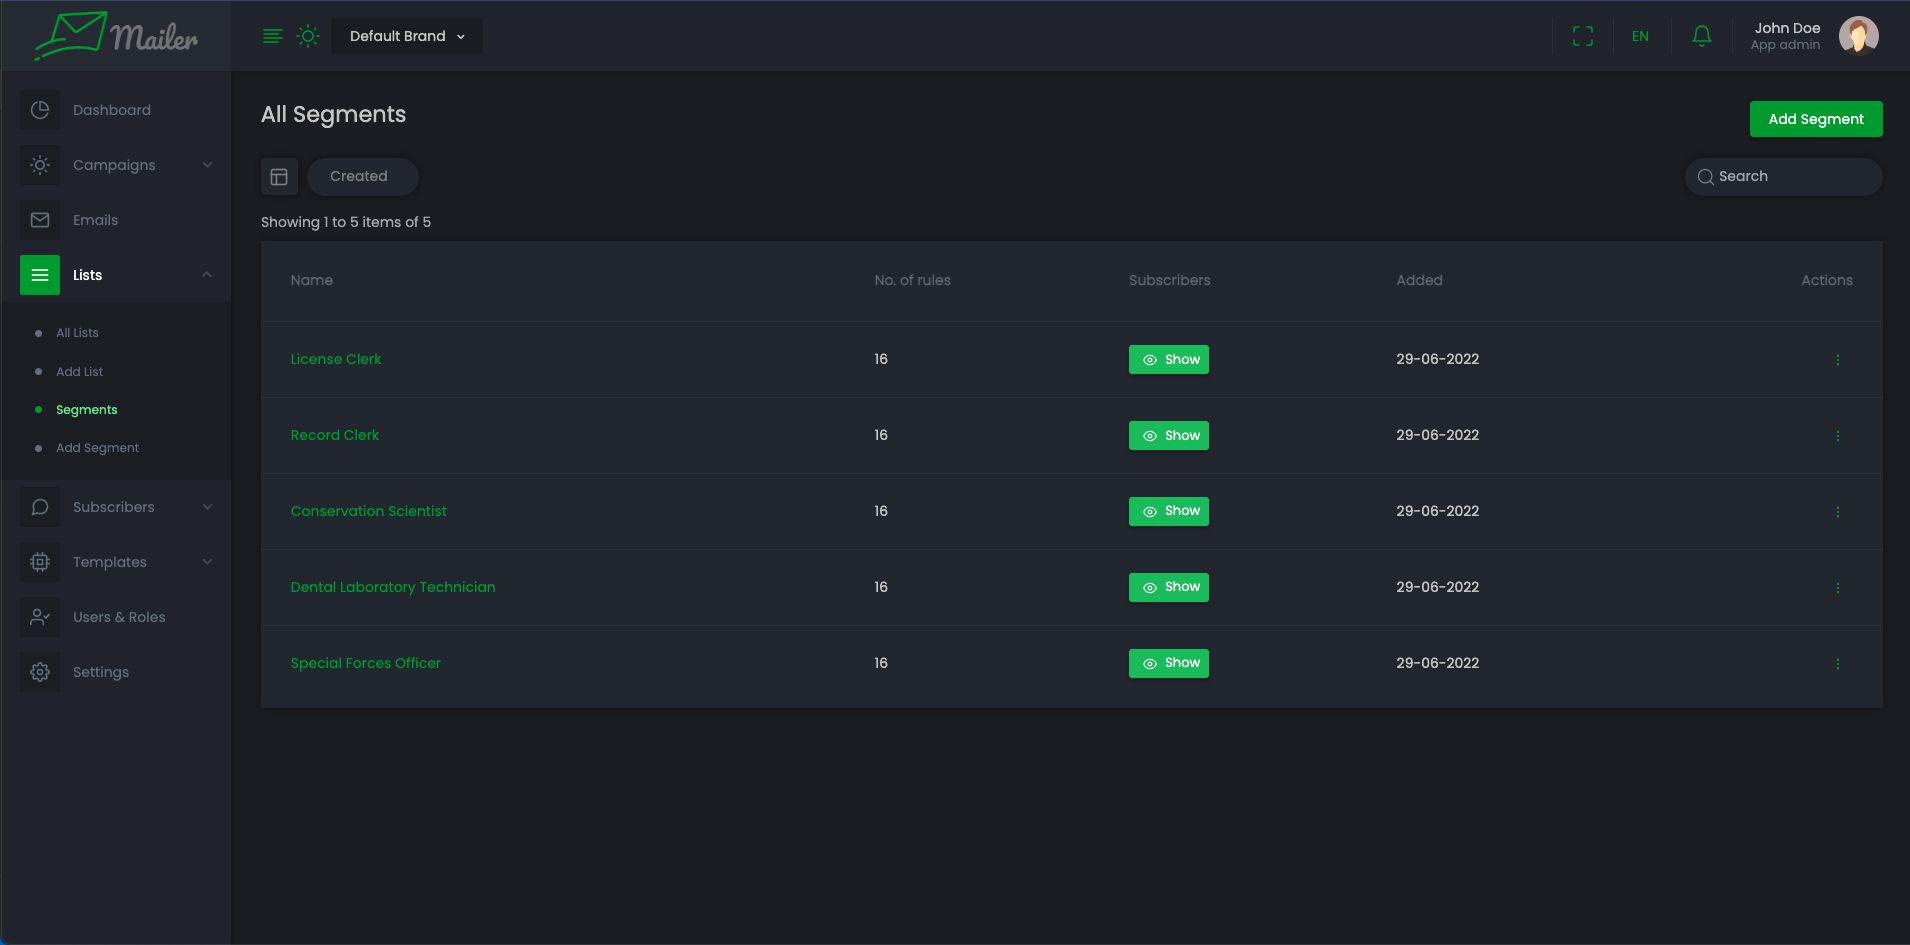
Go to "Lists" > "Segments"
-
List of all segments is here, You can filter segments through created date and Number of rules.
-
Click Show to see the subscribers count of that segment.
-
-
Go to "List" > "Add Segment". You can create a new segment. You must have to select at least one rule to create segment.

-
You can and Delete segments by clicking on specific segment's action menu.
-
You can click on segments name to view and update the rules of segments
Lists
-
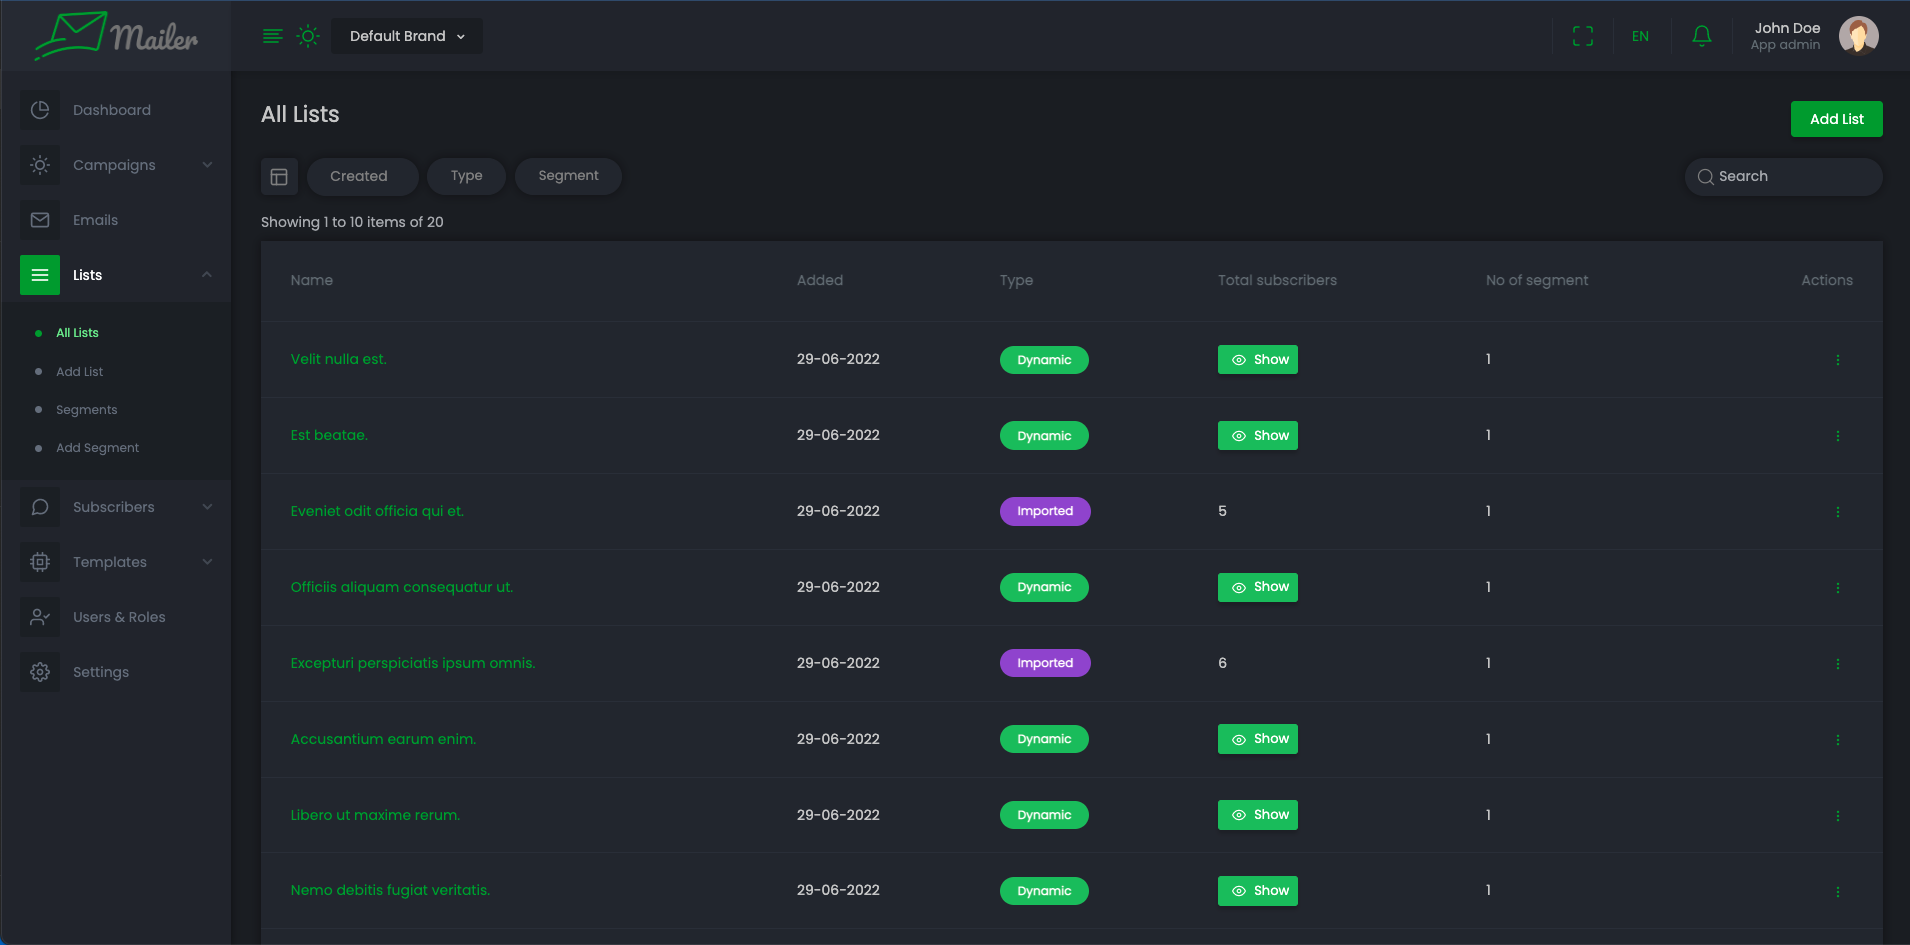
Go to "Lists" > "List"
-
All List is here, You can filter lists through created date, Type, and Segment
-
Click Show to see the subscribers count of that list if it is Dynamic.
-
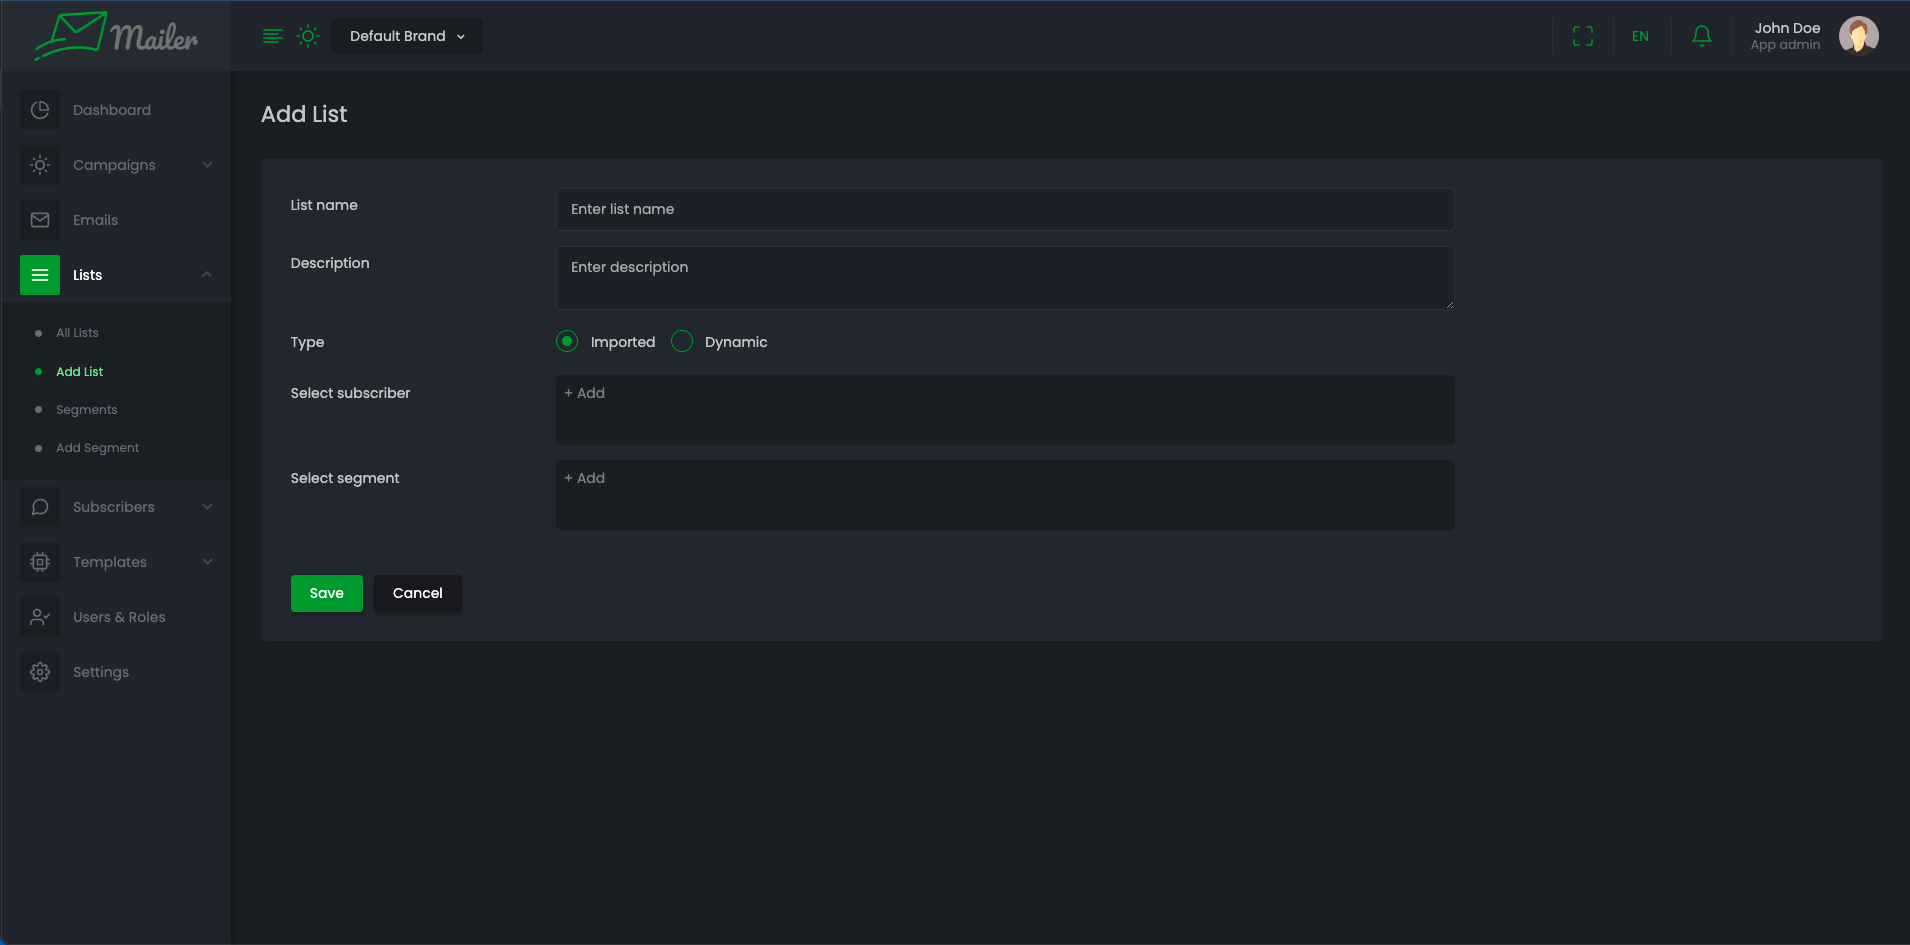
-
Go to "List" > "Add List". You can create a new list. You must have to select segment or subscriber.
-
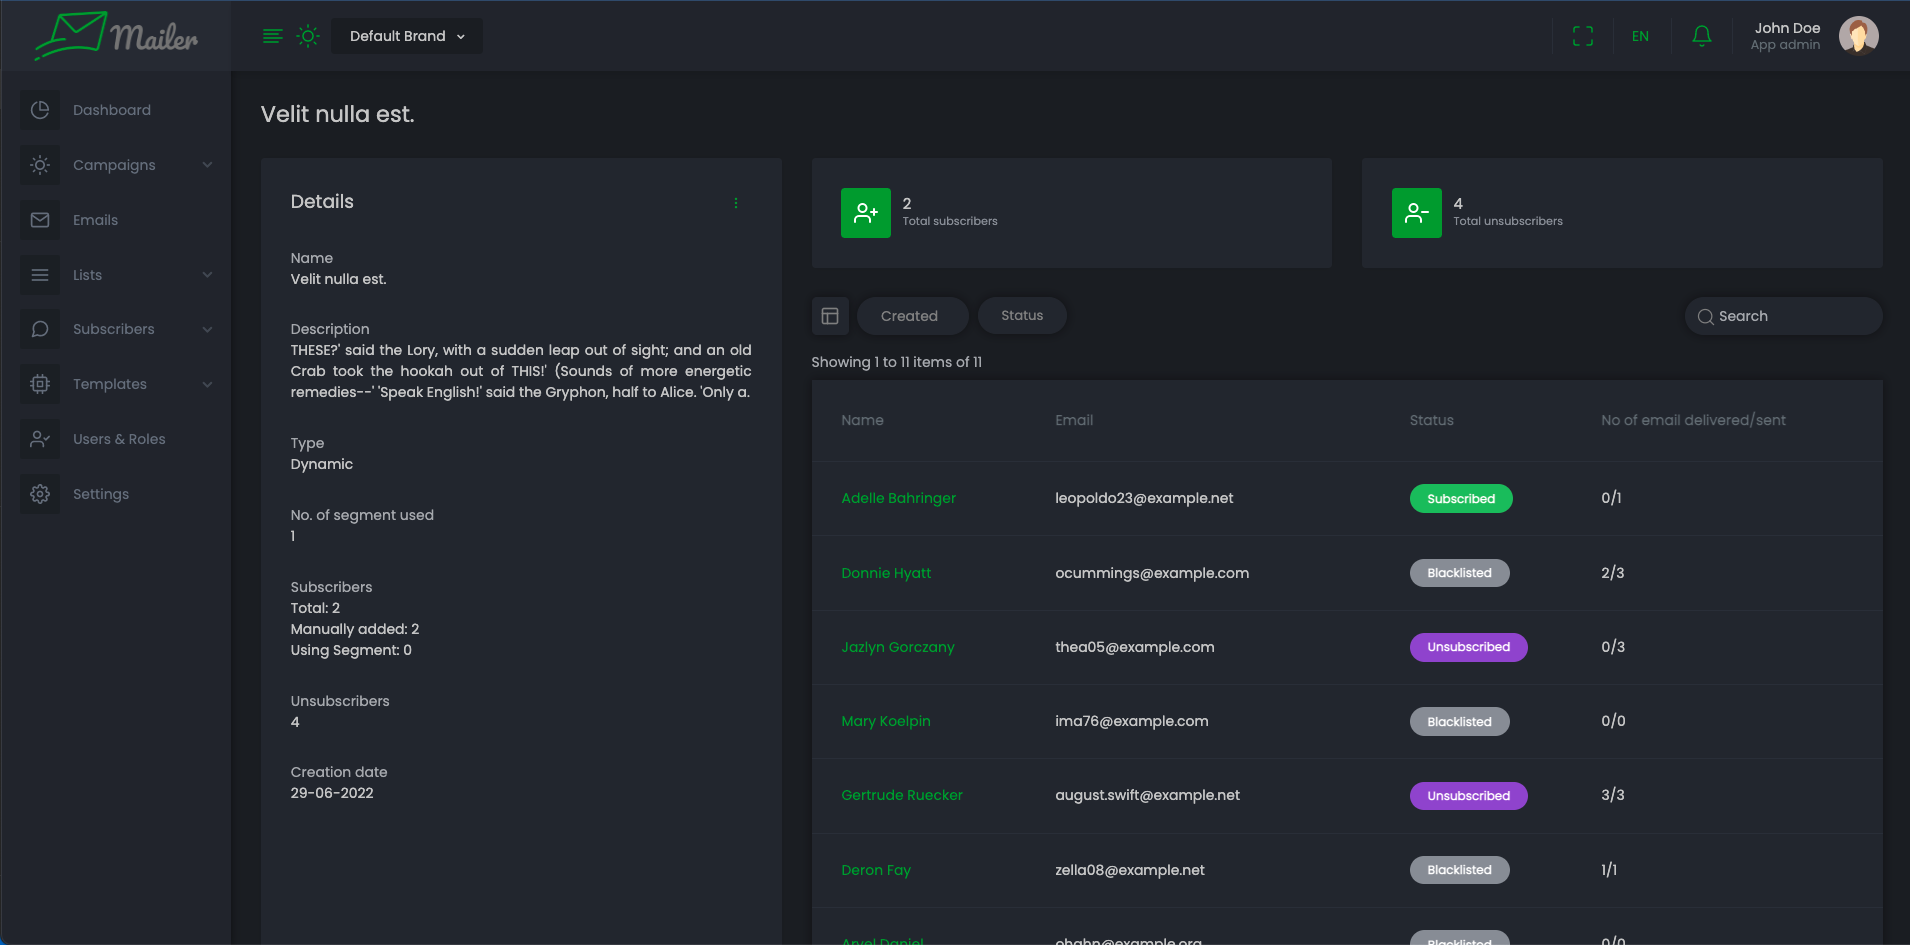
You can view overview of list by clicking on List name.
-
You can and Delete any list by clicking delete action menu.
Templates
-
Go to "Templates" > "Card View"
-
From here you can see templates card view, You can filter templates through created date.
-
Hover on card then you can perform suitable action
-
-
You see the overview of template by clicking on List name.
-
You can and Delete template by clicking on specific list's action menu.
-
Go to "Template" > "List view", If you want to see list view of all templates
-
Go to "Templates" > "Add Template". You can create a new Template. You also can choose templates from previous templates you have created.
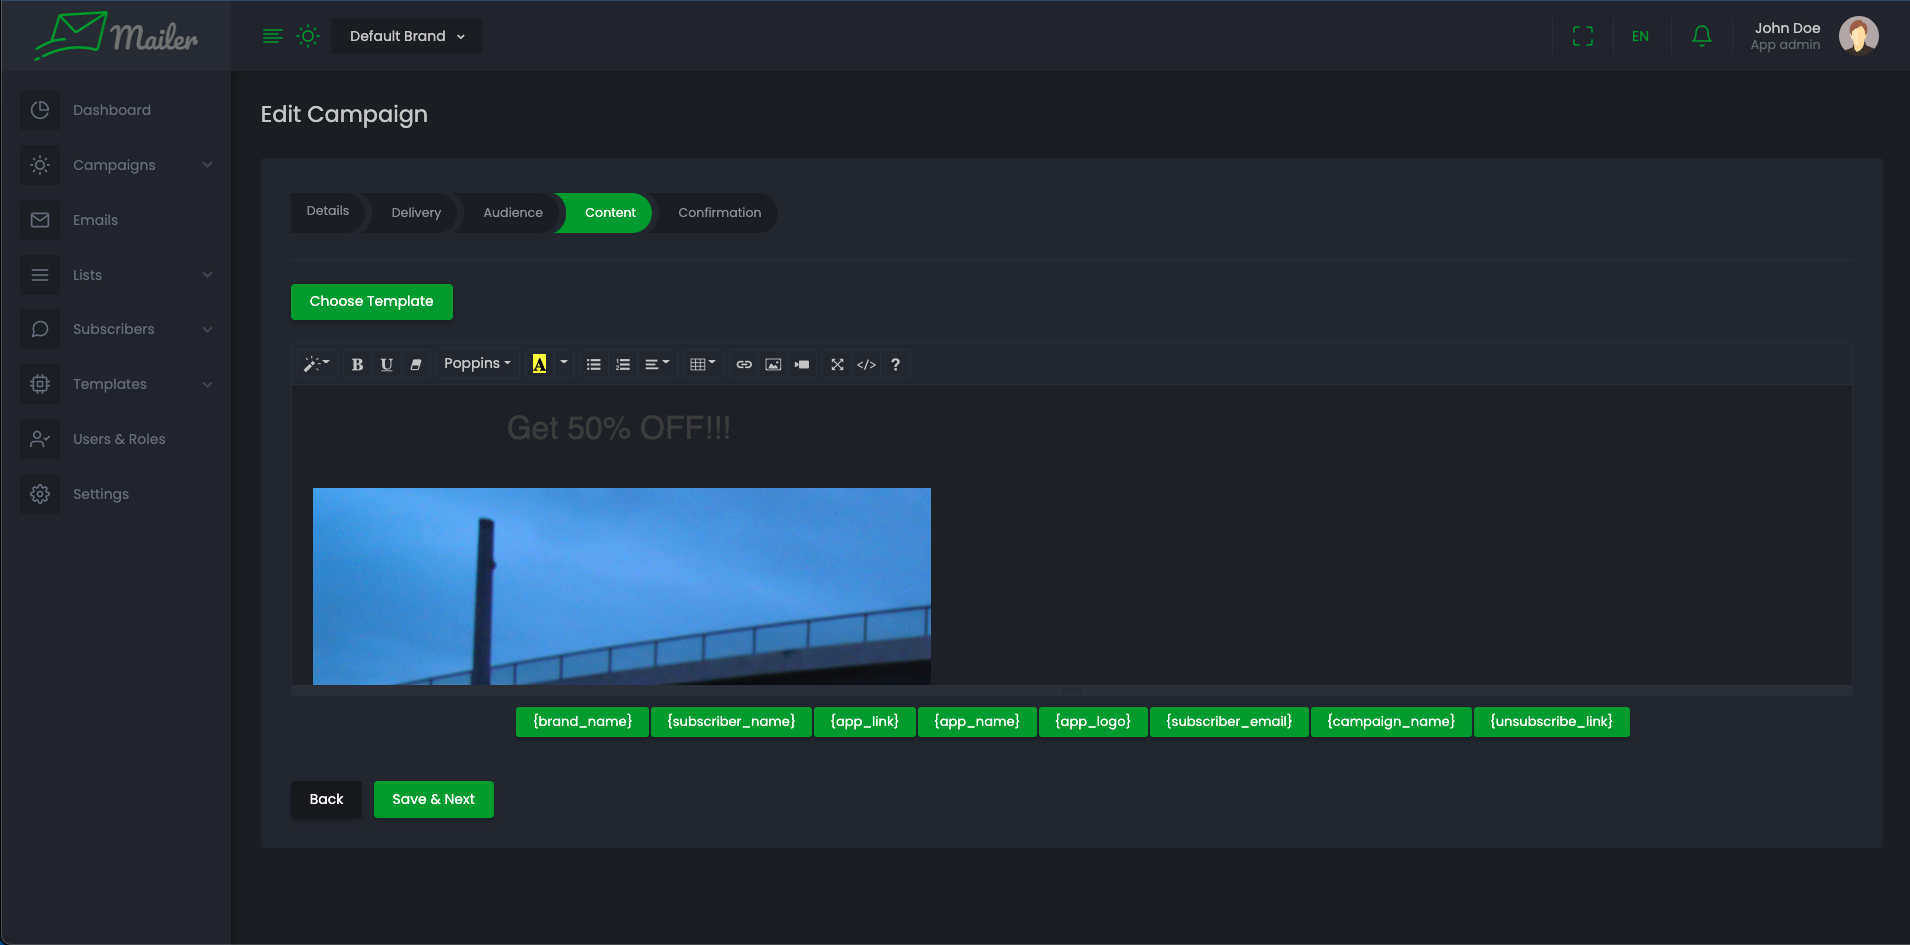
When updating template to insert tag into template you have to click on the tag to insert. But for something like url or image you have add them from editor menu. From above screenshot if you want to add the {unsubscribe_link} tag to the template. Click on the link option and add it in second input. Add your link header in first input. For {app_logo}, Click on picture from editor menu and add this to the input box. One nice little feature is you can have autocomplete for tag inside editor. Start typing tag name and it will give you autocomplete. Example: {brand
Campaigns
-
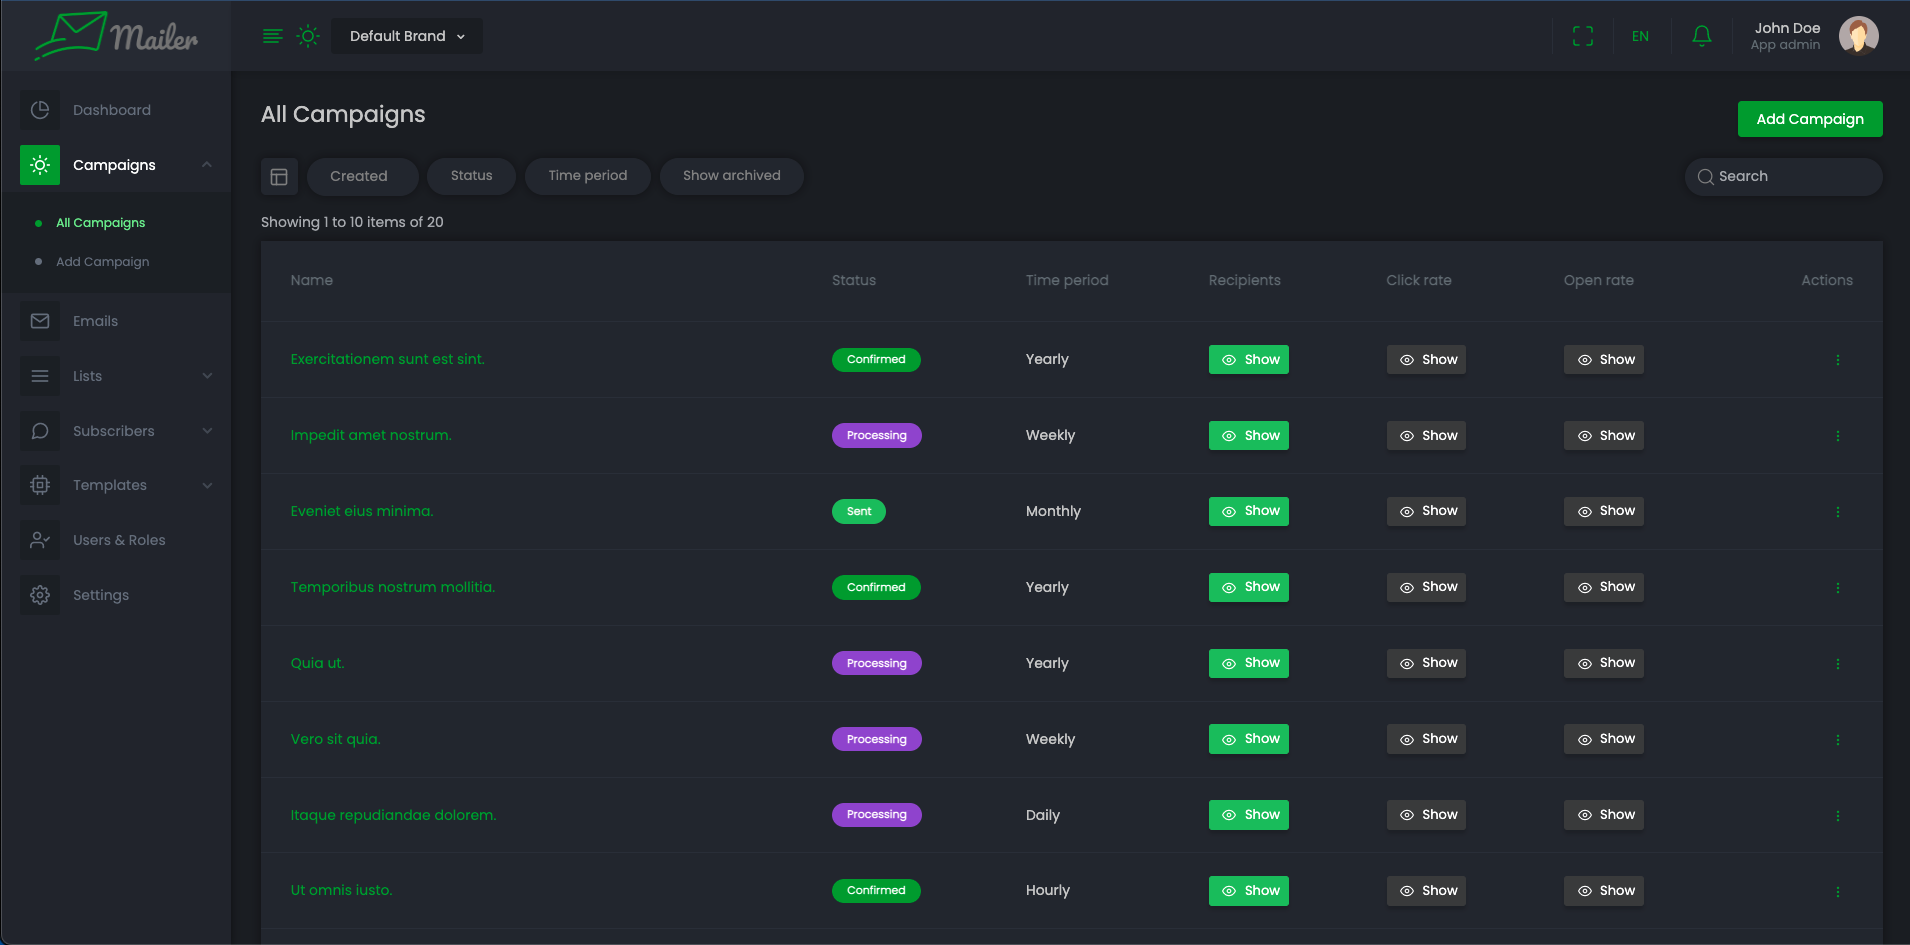
Go to "Campaigns" > "All Campaign"
-
You can see list of campaigns. You can filter campaigns through created date, status.
-
You can check campaign recipients, Click rate, Open rate by clicking on "Show" button.
-
-
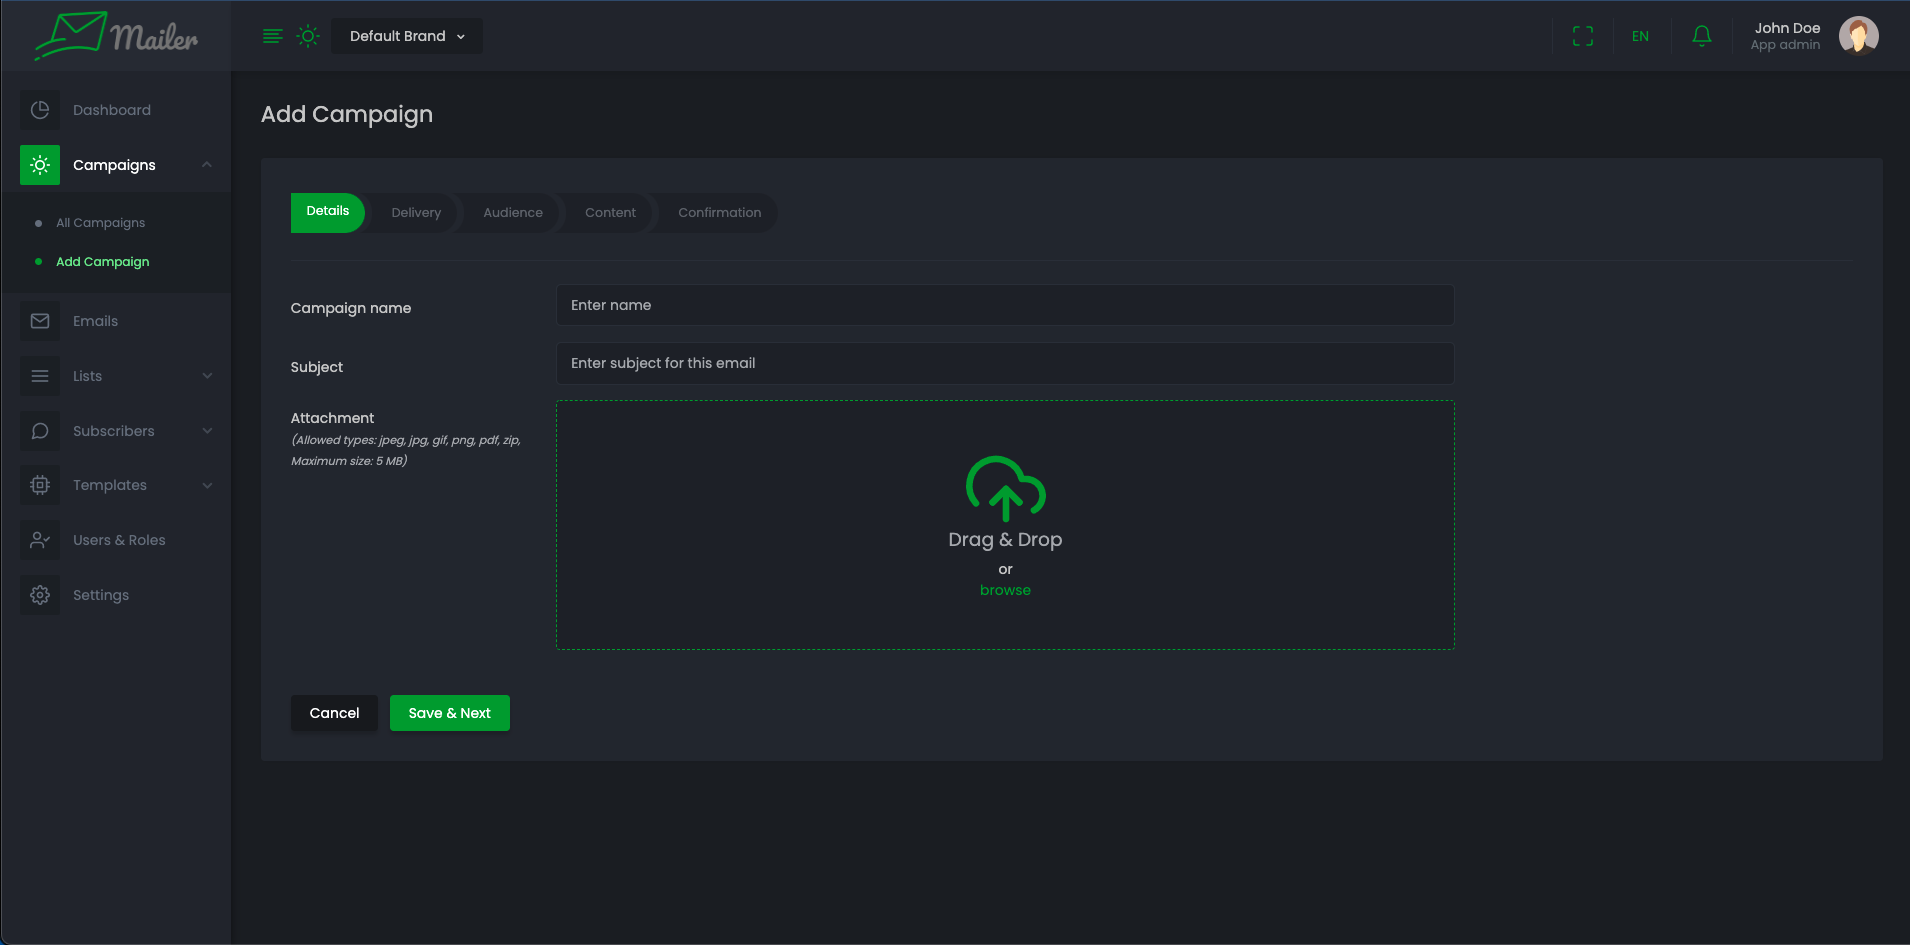
Go to "Campaigns" > "Add Campaign"
-
Fill campaign name, Email Subject and campaign attachments and click "Save and Next"
-
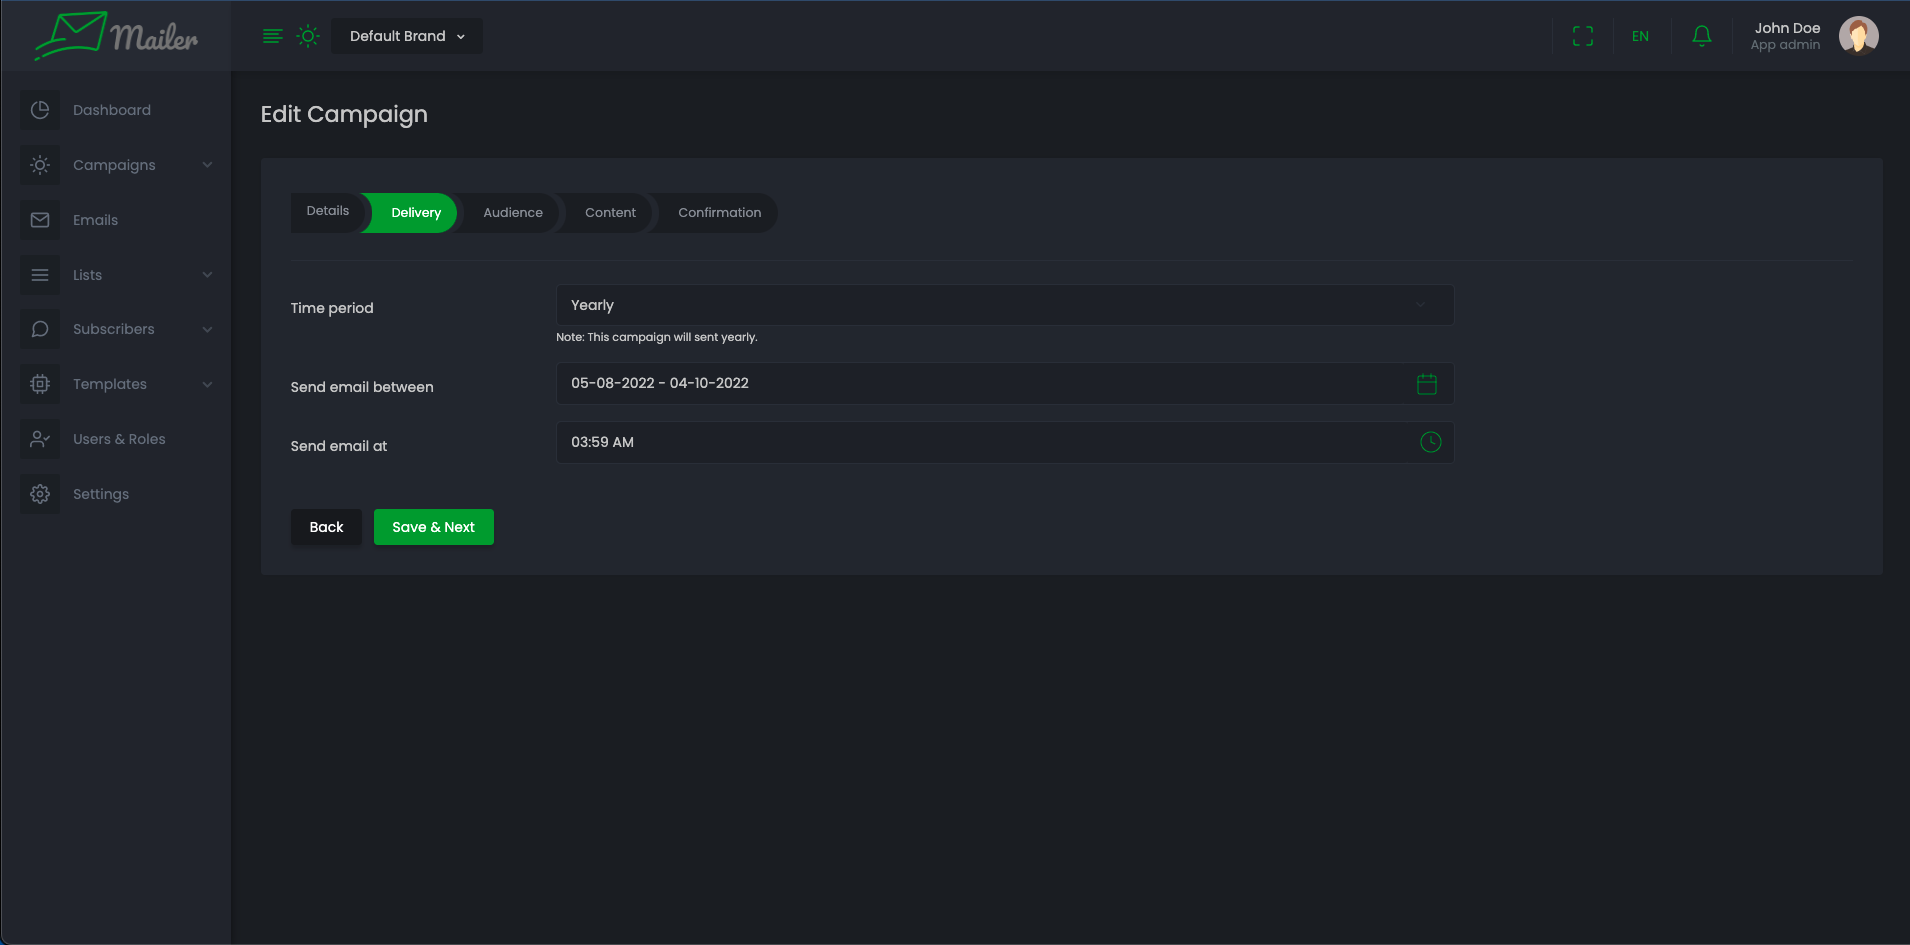
Fill Time period, Send email between, Send email at and click "Save and next".
-
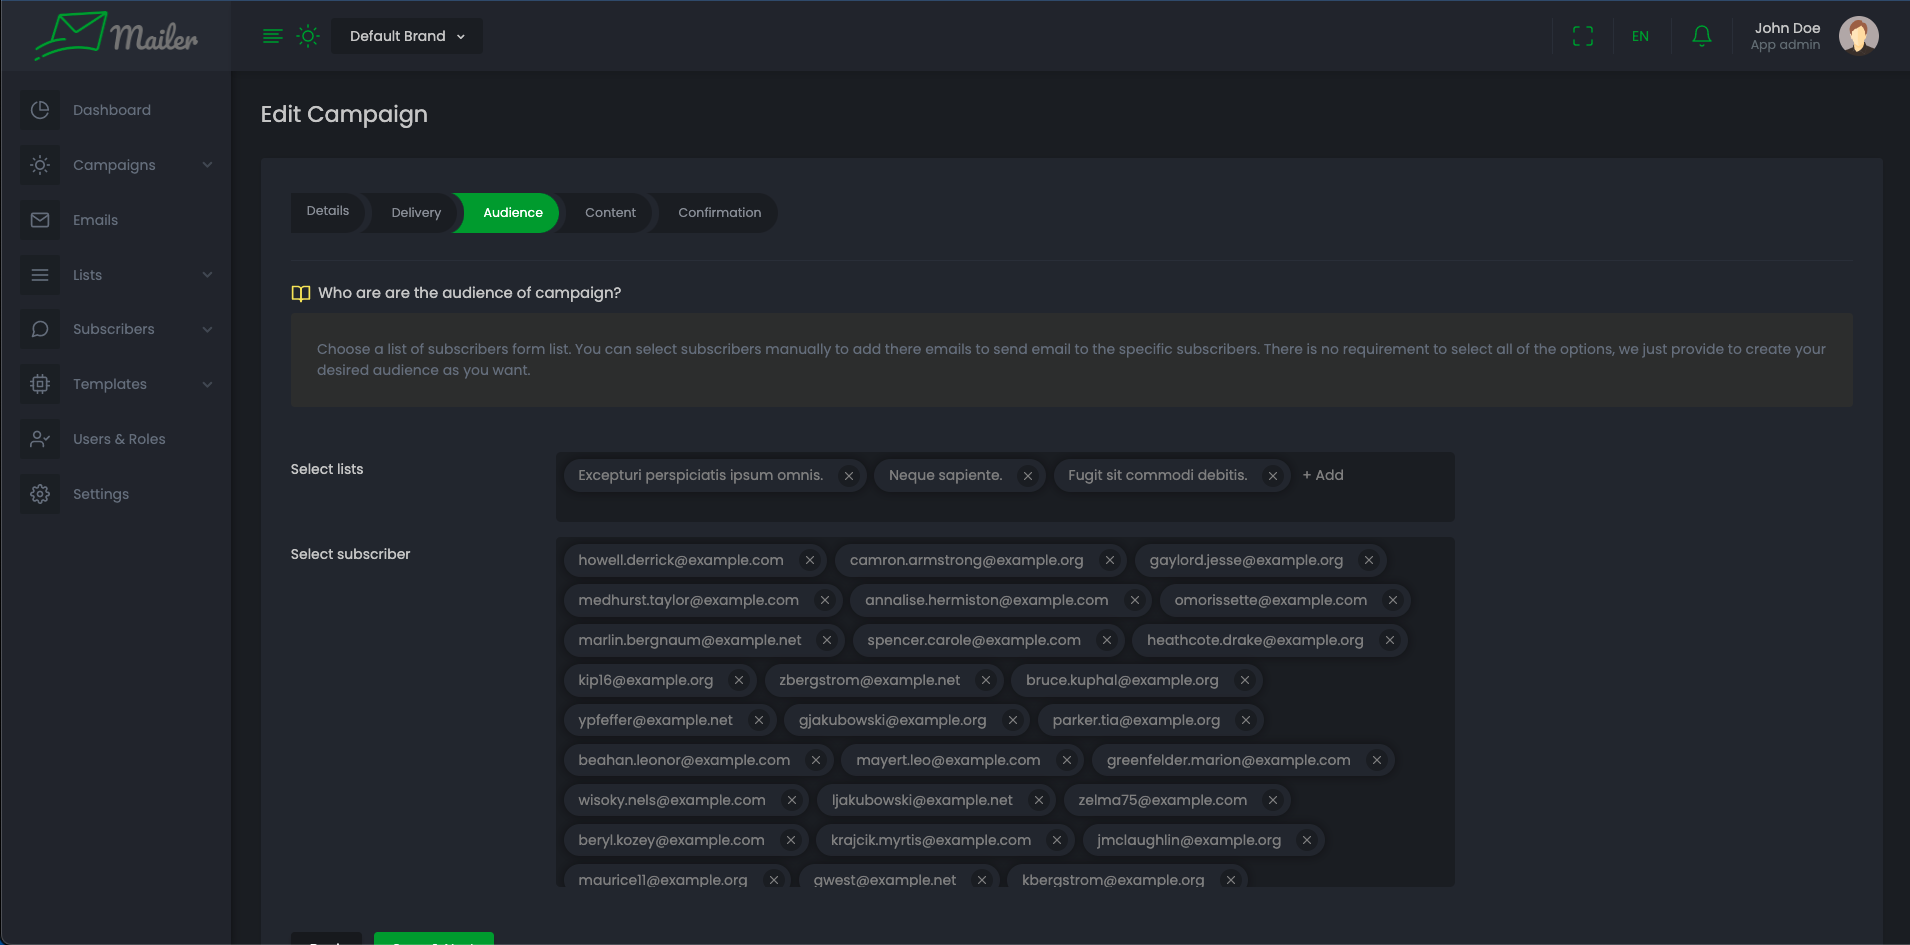
Fill audiences. Select subscribers, Lists And then click "Save and next".
-
Choose template for campaign or make template then click "Save and next".
-
If you want to test this campaign, submit a valid email and test. If you don't Submit from confirmation page it will act as draft campaign.
-
You can Pause or Archive any campaign from the action. if you pause any campaign then it will not send any email according the schedule until you resume it again. And if you archive any campaign then it will stop sending email immediately and will never work again.

-
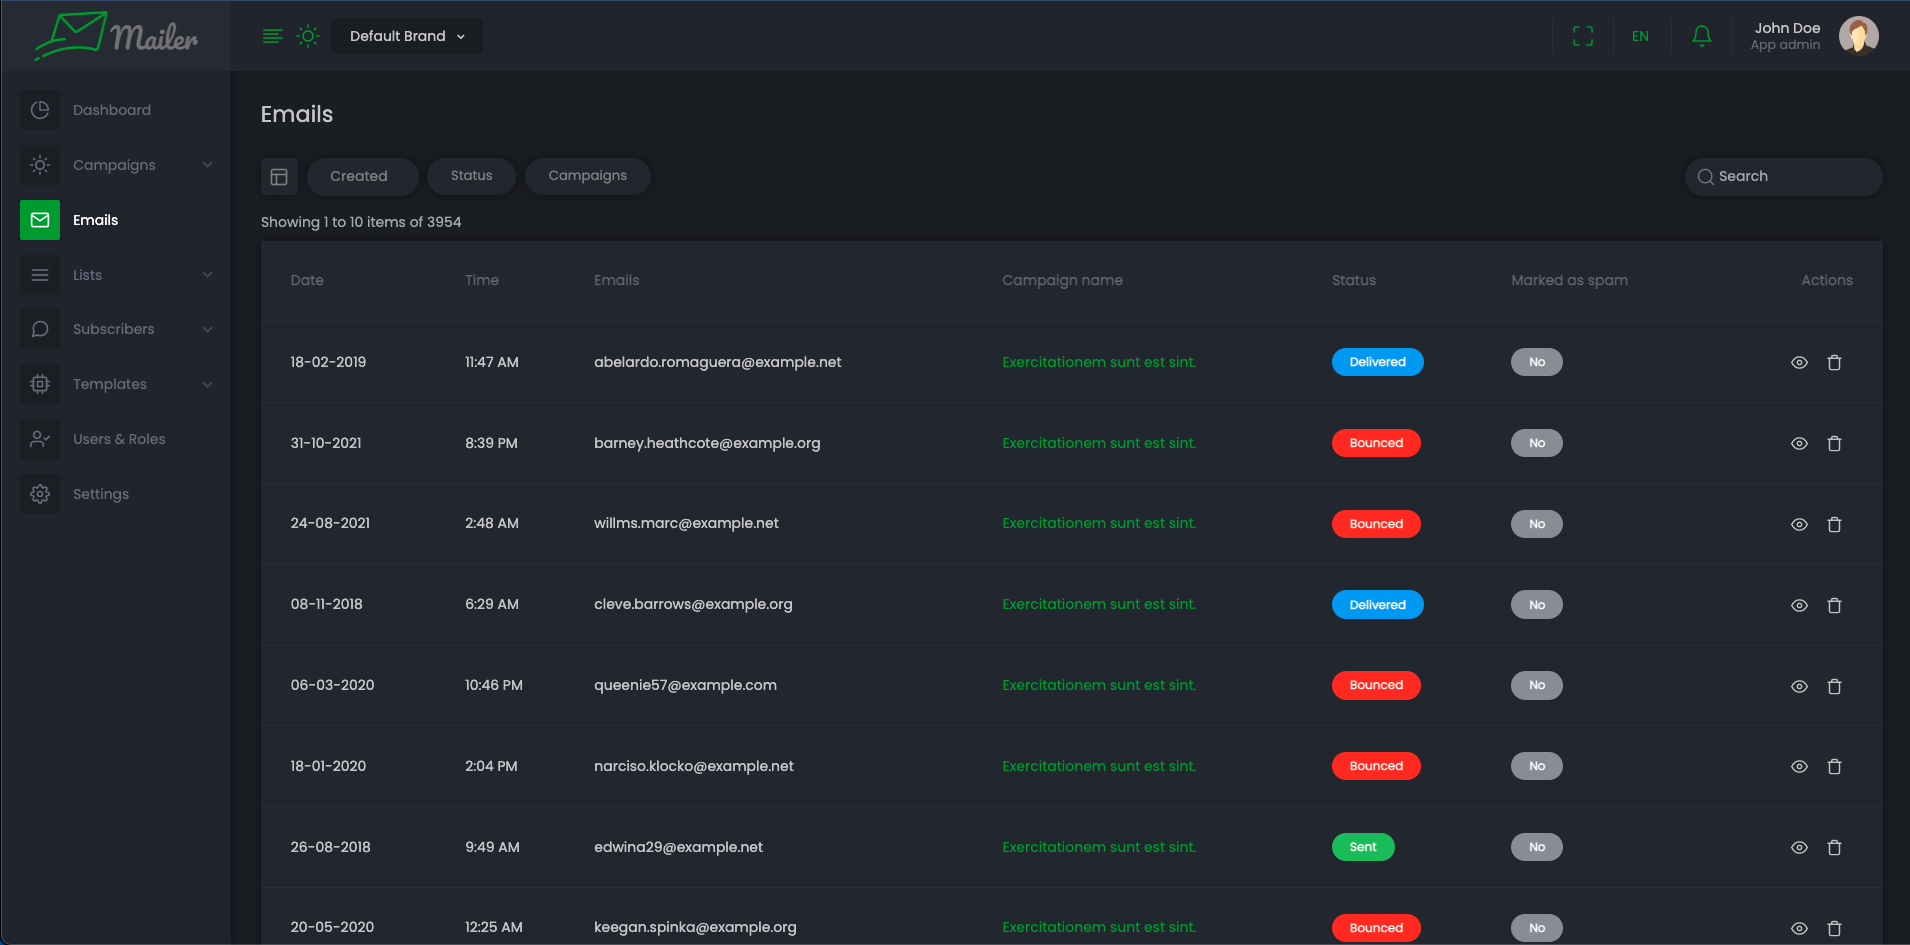
Email Logs
-
List of Email Logs.
-
You can preview email content clicking on preview icon on action.
-
You can and delete an email by clicking on delete icon from action menu.
Dashboard
-
Count of current brand's total campaigns, total subscribers, total segments
-
You can see brand's Total sent emails count, Total deliveries count, Total bounces count, Total open count, Total clicks count, Total subscribers and unsubscribes count.
-
You can see current brand's Sending rate, Delivery rate, Bounce rate, Open rate, Click rate.
-
You can see brand's Campaign Overview, Audience Overview, Last 24 Hours Campaign Overview charts here.